


www.kodak.com/go/aiosupport 25
Kodak ESP 9 All-in-One printer
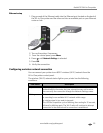
Ethernet setup
1. Plug one end of the Ethernet cable into the Ethernet port located on the back of
the All–in–One printer and the other end into an available port on your Ethernet
router or hub.
2. Turn on the printer, if necessary.
3. From the control panel, press
Menu.
4. Press until
Network Settings is selected.
5. Press
OK.
6. Verify the connection.
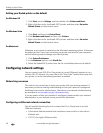
Configuring a wireless network connection
You can connect your printer to an 802.11 wireless (Wi-Fi) network from the
All-in-One printer control panel.
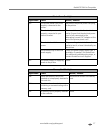
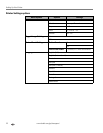
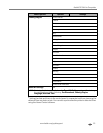
The wireless (Wi-Fi) network status light on your printer has the following
conditions:
LED Status Description
Fully lit When lit, signals that a wireless (Wi-Fi) network connection has
authenticated to the router, but your connection may not be active.
You can verify the connection through the Network Settings menu.
Blinking Blinks when
• searching for an available Wi-Fi network within range
• existing signal is too weak to transmit
The LED has a repetitive cycle of blinking, then resting for 15 seconds,
followed by blinking again. The Wi-Fi radio will continue to attempt
connection to the network until a connection is established.