Partial 4 x 6 in. (10 x 15 cm) photo prints when using a PictBridge-enabled digital
camera
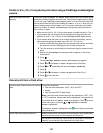
Make sure paper size is set
correctly
The printer issues the Paper or Photo Size Error when your chosen photo
size does not match the paper size that is set. This typically happens you are trying
to print from your PictBridge-enabled digital camera. You may have left the printer
control panel Photo Size menu item setting at 8.5x11” or 5 x 7” size, but your
camera setting has print size of 4x6” or L. You need to make sure your chosen
photo size is 4x6” or 10x15 cm depending on the typically used photo size for
your country or region.
• Make sure the 4 x 6 in. (10 x 15 cm) photo paper is loaded correctly in Tray 1.
• If your camera lets you change the print size setting, change the print size
selection to 4 x 6 in. (10 x 15 cm) on the PictBridge-enabled digital camera.
• If your camera does not allow you to change the paper size setting, use the
control panel to change the paper size to 4 x 6 in. (10 x 15 cm).
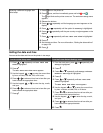
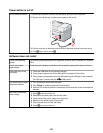
1 Insert the USB cable that came with your camera to the camera, and insert
the other end into the PictBridge port on the front of the printer.
2 Turn the camera on and choose your first photo using the camera control
panel.
3 Wait for the PictBridge Printing screen to appear on the printer
control panel
4 Press
.
The PictBridge Default Print Settings menu appears.
5 Press or until 4x6” or 10x15 cm appears for Photo Size.
6 Press or repeatedly until you reach Paper Handling.
7 Press .
8 Press or until 4x6” or 10x15 cm appears for Size-Tray 1.
9 Press to save and exit.
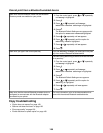
Cannot print from a flash drive
Check the type of files contained on the flash
drive
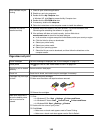
The printer recognizes:
• Files that have extensions *.DOC, *XLS, and *PPT
• Photos
• Files that have FAT 32 data format
Note: If the flash drive contains only files with extensions *.DOC, *XLS,
or *PPT, the Print Files menu will be highlighted. If any photos are
on the flash drive, the Photo Card menu appears. Press to return
to the main menu, and press or repeatedly until Print
Files is highlighted.
Once Print Files is highlighted, press
to view the files contained
on the flash drive.
Check cable connections and power Make sure the printer is connected to your computer using a USB cable,
and that both the printer and the computer are turned on.
If the printer is connected to a print server or connected on a wireless
network, you cannot print files contained in the flash drive.
157


