


Networking the printer
Installing network printers
Networking the printer
Installing and configuring a printer for use on a network allows users at different computers to print to a common printer.
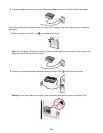
There are three methods for networking the printer:
• Connect the printer to a network router using a direct Ethernet connection.
• Configure a wireless network connection for the printer.
• Connect the printer directly to a network computer using the USB cable and enable it to be shared across the
network (peer-to-peer sharing).
Notes:
– If you want to use an external print server (Lexmark
TM
n4000e, n4050e, or MarkNet
TM
n7000 series), see the
installation instructions and User's Guide that came with the device.
– For wireless setup purposes, the printer must be near the computer you will be using to configure it. After
configuration, the printer can be moved to the location where it will reside.
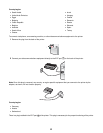
Installing the printer on a network
Follow the instructions for the networking method you want to use. Make sure the selected network is set up and working
properly, and that all relevant devices are turned on. For more information on your specific network, see your network
documentation or consult the person who set up the network.
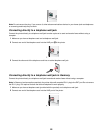
Installing the printer on additional network computers
If you are installing your network printer for use with multiple computers on the network, you must repeat the connection
steps for each computer you want to print to the printer. Repeat the steps for “Using an Ethernet connection” on
page 29, “Using a wireless network connection” on page 28, or “Shared printing” on page 29 depending on the
networking method you have chosen.
Notes:
• You do not need to reconnect the printer with the USB cable for each additional installation.
• If you are using a wireless network connection, you do not need to reconfigure the wireless print server for each
successive installation.
• The printer should appear as a highlighted printer in the installation. If multiple printers show up in the list, make
sure you select the printer with the correct IP address/MAC address. If you need help finding the IP or MAC address,
see “Finding your MAC address” on page 31.
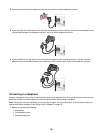
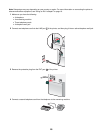
Using a wireless network connection
This printer contains an internal wireless print server, which allows the printer to be used on a wireless network. The
following settings from your existing wireless network may be needed to properly configure the printer for use on the
network:
• The Network Name, also known as the SSID
• The wireless mode (the type of wireless network you are using, Ad-Hoc or Infrastructure)
• The type of security used on the network (WEP, WPA, WPA2)
• Any applicable security keys or passwords used with the network security encryption type
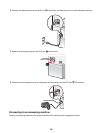
1 Insert the printer software CD.
2 Select the Network Installation option, and then click Next.
28