


Make sure Fax
Forwarding is not
selected
1 From the control panel, press or repeatedly until Fax is highlighted.
2 Press .
3 Press
or repeatedly until the Fax Setup submenu is highlighted.
4 Press .
5 Press or repeatedly until the Ringing and Answering submenu is
highlighted.
6 Press .
7 Press
or repeatedly until you reach Fax Forward.
8 Press or repeatedly until Off appears.
9 Press to save the setting.
Can receive but not send faxes
Check mode selection To make sure the printer is set for faxing:
1 Press or repeatedly until Fax is highlighted.
2 Press .
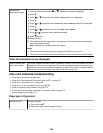
Check document
placement
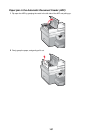
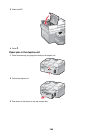
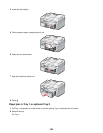
Load the original document faceup in the Automatic Document Feeder (ADF) or facedown
on the scanner glass in the corner indicated by the arrows.
Check the Dial Prefix
setting
1 From the control panel, press or repeatedly until Fax is highlighted.
2 Press .
3 Press
or repeatedly until the Fax Setup submenu is highlighted.
4 Press .
5 Press or repeatedly until the Dialing and Sending submenu is highlighted.
6 Press .
7 Press
or repeatedly until you reach Dial Prefix.
8 To change the setting, press or repeatedly until Create appears.
9 Press .
10 Enter the prefix to be dialed before each telephone number.
11 Press to save.
Check Speed Dial
number
• Check to make sure Speed Dial has been programmed for the number that you want to
dial. See “Setting up Speed Dial numbers” on page 132.
• As an alternative, dial the telephone number manually.
164