


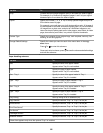
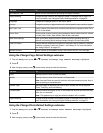

Use this To
On Hook Dial Dial a telephone number while listening to the call through
a speaker on the printer. This is useful when you must
navigate an automated answering system before sending
your fax.
Delay Sending Fax Enter a specific time to send a fax.
Note: Make sure the date and time are entered correctly
before setting a specific time to send a fax.
Auto Answer Answer all incoming phone calls.
Edit Fax Settings Change fax settings, such as Cover Page, Color, Quality,
and Lighter/Darker.
Fax Setup Access the Fax Setup menu and menu items. You can
change the values and save them as user default settings.
• Add and edit entries in the Speed Dial Phone Book.
• Print fax history or transmission status reports.
• Customize settings in Ringing and Answering
for receiving a fax.
• Select fax printing options.
• Customize settings in Dialing and Sending for
sending a fax.
• Block faxes from the numbers you specify.
Once each value is chosen, press
to save the values
as user default settings and exit.
Note: The user default setting remains in effect until you
access the menu again, choose another value, and save
it. An asterisk (*) appears next to the user default setting.
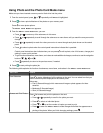
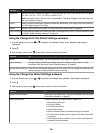
Using Scan and the Scan Mode menu
To access and navigate:
1 From the control panel, press
or repeatedly until Scan is highlighted.
2 If the printer is connected to your computer through a USB cable, press for a Quick Scan if you do not want to
make any changes for this scan job.
or
If you want to make changes in the way this scan job is processed, press .
The Downloading scan applications list from your computer. Please wait. message appears
for a few seconds.
The Scan Mode menu appears.
Note: If your printer is connected on a network, see “Scanning to a computer over a network” on page 122.
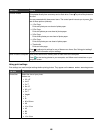
3 From the Scan Mode menu, you can:
• Press
to preview the job.
• Press to return to the Scan Mode menu from the preview if you need to change a value.
51