


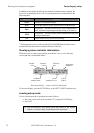
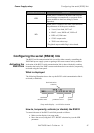
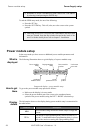
Configuring the serial (RS232) link Power Supply setup
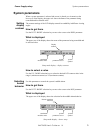
Using the UP / DOWN selection keys change the state of the RS232
serial link to one of the following:
o “SERIAL = NO” to disable the RS232 serial communication link.
o “SERIAL = YES” to activate the RS232 serial communication
link. Selecting this state, automatically changes the display to the
RS232 setup mode. If the GPIB link is also active, the RS232
serial link will be set to the monitor mode of operation.
Setting
RS232
parameters
When the RS232 serial link is active, its mode of operation is automatically set to
monitor when the GPIB link is also active (being used for remotely controlling the
XMP power supply system).
All other RS232 parameters (including the operating mode when the GPIB link is
disabled) are set using the front panel.
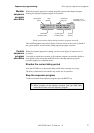
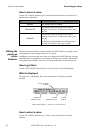
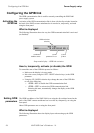
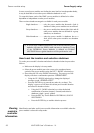
What is displayed
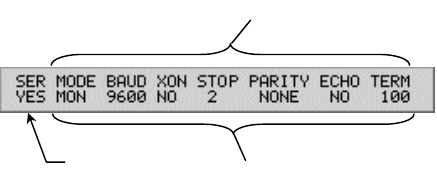
The following illustration shows the display layout when setting up the RS232 serial
link parameters:
Activation
Parameters values
Parameters
Setup mode display – serial link setup
The upper row of the display is showing the parameter names while the lower row
displays the current values of the parameters.
How to get there
To enter the RS232 serial communication link setup proceed as follows:
Make sure the display is in setup mode.
Move the cursor (using the LEFT / RIGHT selection keys) to the SER
parameter.
Using the UP / DOWN selection keys change the state of the RS232
serial link to one of the following:
o If the display reads “SERIAL = NO” use the UP / DOWN
selection keys to change it and enter the RS232 setup.
o If the display reads “SERIAL = YES” press the SET key to enter
the RS232 setup.
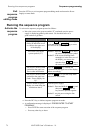
Setting RS232 parameters
To set (change the value of) an RS232 parameter proceed as follows:
Select the value of the parameter you wish to change using the LEFT /
RIGHT selection keys.
Select the desired new value by using the UP / DOWN selection keys.
Press the ENTER key for the default value.
82 XMP 2600 User’s Guide rev. 1.0