


Power Supply setup Configuring the GPIB link
Activation
Parameters values
Parameters
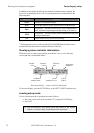
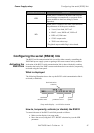
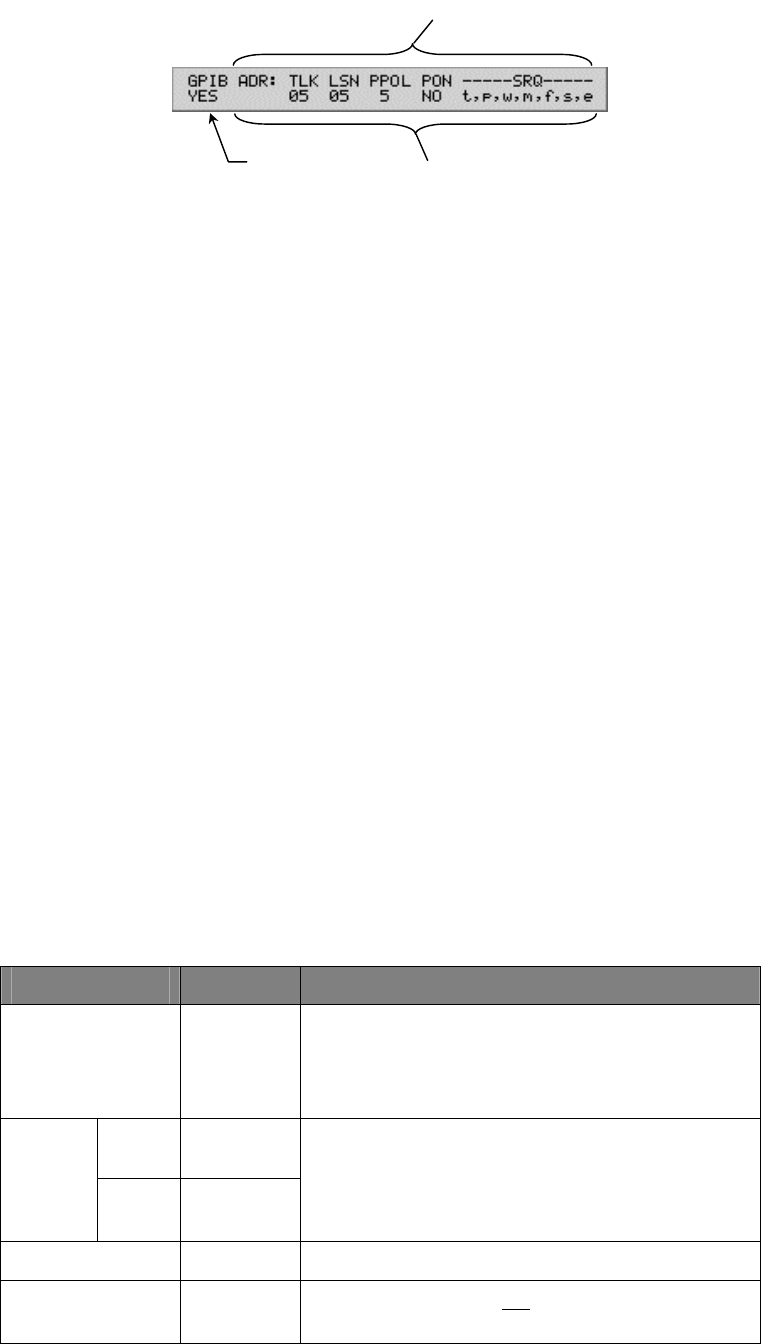
Setup mode display – GPIB link setup
In this operating mode, the upper row of the display shows the parameter names
while the lower row displays the current values of the parameters.
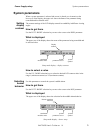
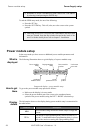
How to get there
To enter the GPIB communication link setup proceed as follows:
Make sure the display is in setup mode.
Move the cursor (using the LEFT / RIGHT selection keys) to the GPIB
parameter.
Using the UP / DOWN selection keys change the state of the GPIB link
to one of the following:
o If the display reads “GPIB = NO” use the UP / DOWN selection
keys to change it and enter the GPIB setup.
o If the display reads “GPIB = YES” press the SET key to enter the
GPIB setup.
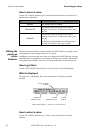
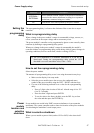
Setting GPIB parameters
To set (change the value of) a GPIB parameter proceed as follows:
Select the value of the parameter you wish to change using the LEFT /
RIGHT selection keys.
Select the desired new value by using the UP / DOWN selection keys.
Press the ENTER key for the default value.
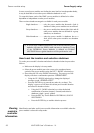
The following table gives detailed description of each parameter and its default
value:
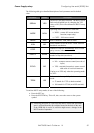
Parameter Default Description
GPIB YES
The GPIB activation selection. The GPIB link
can be disabled here by changing the YES value
to NO (This will terminate the GPIB setup
mode).
TLK 5
ADR
LSN
Same as
TLK
The XMP’s GPIB link can use different
addresses for the talk mode and the listen mode.
This is an obscure operating mode that is to be
used with great care.
PPOL 7
The bit number of the parallel poll status line.
PON and SRQ
SRQ mask bits when not
working in IEEE 488.2
compatible mode. Please ignore.
XMP 2600 User’s Guide
rev. 1.0 85