


4-17
Cisco ASA Series Firewall ASDM Configuration Guide
Chapter 4 Configuring Network Object NAT (ASA 8.3 and Later)
Configuring Network Object NAT
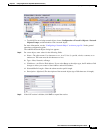
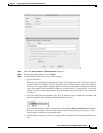
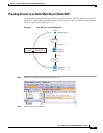
Step 6 In the Translated Addr. field, do one of the following:
• Type the same IP address that you used for the real address.
• Click the browse button, and choose a network object with a matching IP address definition from
the Browse Translated Addr dialog box.
• Click the browse button, and create a new network object with a matching IP address definition from
the Browse Translated Addr dialog box.
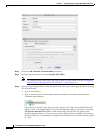
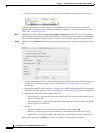
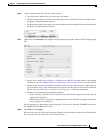
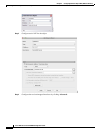
Step 7 (Optional) Click Advanced, and configure the following options in the Advanced NAT Settings dialog
box.
• Disable Proxy ARP on egress interface—Disables proxy ARP for incoming packets to the mapped
IP addresses. See the “Mapped Addresses and Routing” section on page 3-22 for more information.
• (Routed mode; interface(s) specified) Lookup route table to locate egress interface—Determines the
egress interface using a route lookup instead of using the interface specified in the NAT command.
See the “Determining the Egress Interface” section on page 3-24 for more information.
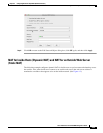
• (Required for Transparent Firewall Mode) Interface:
–
Source Interface—Specifies the real interface where this NAT rule applies. By default, the rule
applies to all interfaces.
–
Destination Interface—Specifies the mapped interface where this NAT rule applies. By default,
the rule applies to all interfaces.
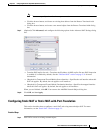
Do not configure any other options on this dialog box. When you are finished, click OK. You return to
the Add/Edit Network Object dialog box.
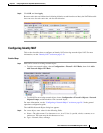
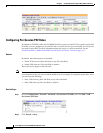
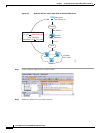
Step 8 Click OK, and then Apply.
Because static rules are bidirectional (allowing initiation to and from the real host), the NAT Rules table
show two rows for each static rule, one for each direction.