


29-5
Cisco ASA Series Firewall ASDM Configuration Guide
Chapter 29 Configuring Filtering Services
Filtering URLs and FTP Requests with an External Server
• Buffering the Content Server Response, page 29-5
• Caching Server Addresses, page 29-5
• Filtering HTTP URLs, page 29-6
Buffering the Content Server Response
When you issue a request to connect to a content server, the ASA sends the request to the content server
and to the filtering server at the same time. If the filtering server does not respond before the content
server, the server response is dropped. This behavior delays the web server response for the web client,
because the web client must reissue the request.
By enabling the HTTP response buffer, replies from web content servers are buffered, and the responses
are forwarded to the requesting client if the filtering server allows the connection. This behavior prevents
the delay that might otherwise occur.
To configure buffering for responses to HTTP or FTP requests, perform the following steps:
Step 1 In the URL Filtering Servers pane, click Advanced to display the Advanced URL Filtering dialog box.
Step 2 In the URL Buffer Size area, check the Enable buffering check box.
Step 3 Enter the number of 1550-byte buffers. Valid values range from 1 to 128.
Step 4 Click OK to close this dialog box.
Caching Server Addresses
After you access a website, the filtering server can allow the ASA to cache the server address for a
certain period of time, as long as each website hosted at the address is in a category that is permitted at
all times. When you access the server again, or if another user accesses the server, the ASA does not
need to consult the filtering server again.
Note Requests for cached IP addresses are not passed to the filtering server and are not logged. As a result,
this activity does not appear in any reports. You can accumulate Websense run logs before using the
url-cache command.
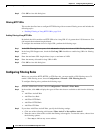
To improve throughput, perform the following steps:
Step 1 In the URL Filtering Servers pane, click Advanced to display the Advanced URL Filtering dialog box.
Step 2 In the URL Cache Size area, check the Enable caching based on check box to enable caching according
to the specified criteria.
Step 3 Click one of the following radio buttons:
• Destination Address—This option caches entries according to the URL destination address. Choose
this setting if all users share the same URL filtering policy on the Websense server.
• Source/Destination Address—This option caches entries according to both the source address that
initiates the URL request and the URL destination address. Choose this setting if users do not share
the same URL filtering policy on the server.
Step 4 Enter the cache size within the range from 1 to 128 (KB).