


25-24
Cisco ASA Series Firewall ASDM Configuration Guide
Chapter 25 Configuring the ASA for Cisco Cloud Web Security
Configuring Cisco Cloud Web Security
Detailed Steps
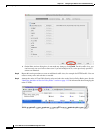
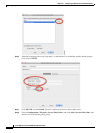
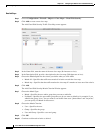
Step 1 Choose Configuration > Firewall > Objects > Class Maps > Cloud Web Security.
Step 2 Click Add to create a new class map.
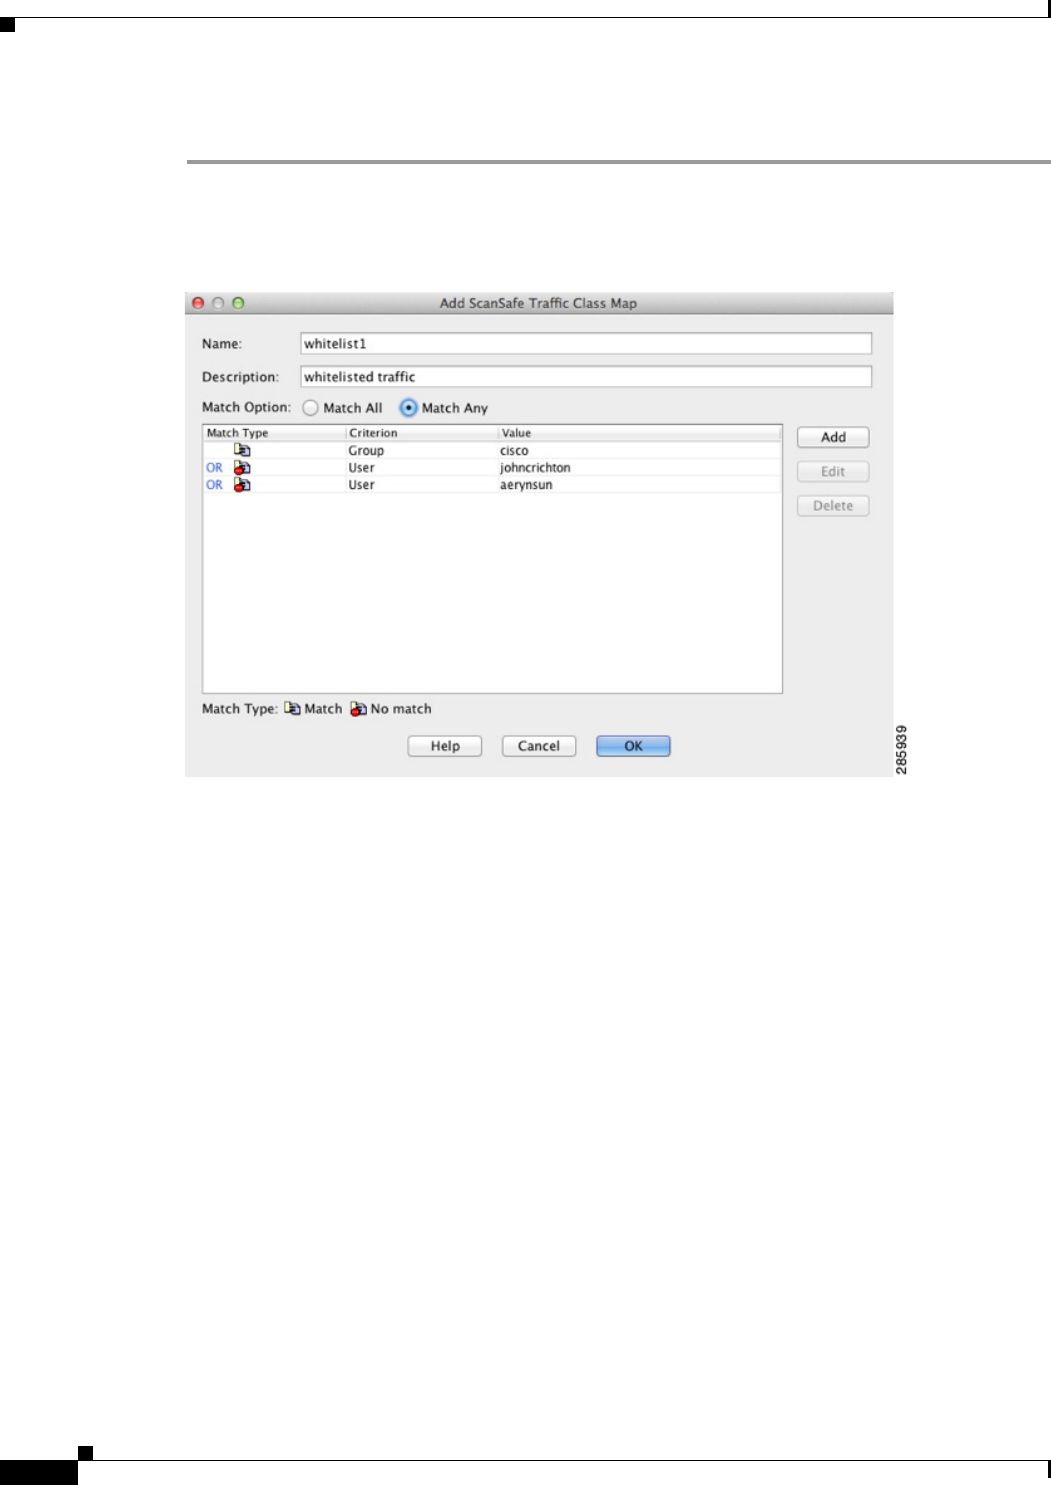
The Add Cloud Web Security Traffic Class Map screen appears.
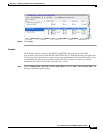
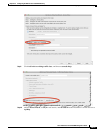
Step 3 In the Name field, enter the name of the new class map (40 characters or less).
Step 4 In the Description field, provide a description for the class map (200 characters or less).
Step 5 Choose the Match Option for the criteria you define when you click ADD:
• Match All—Specifies that traffic must match all criteria to match the class map.
• Match Any—Specifies that the traffic matches the class map if it matches at least one of the criteria.
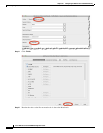
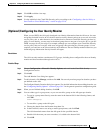
Step 6 Click Add.
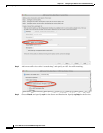
The Add Cloud Web Security Match Criterion Window appears.
Step 7 Choose the Match Type:
• Match—Specifies the user and/or group that you want to whitelist.
• No Match—Specifies the user and/or group that you do not want to whitelist; for example, if you
whitelist the group “cisco,” but you want to scan traffic from users “johncrichton” and “aerynsun,”
you can specify No Match for those users.
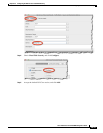
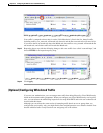
Step 8 Choose the Match Criterion:
• User—Specifies the user.
• Group—Specifies the group.
• User and Group—Specifies a user and group.
Step 9 Click OK.
Step 10 Continue to add match criteria as desired.