


30-13
Cisco ASA Series Firewall ASDM Configuration Guide
Chapter 30 Configuring the ASA CX Module
Configuring the ASA CX Module
The boot software lets you set basic ASA CX network configuration, partition the SSD, and download
the larger system software from a server of your choice to the SSD.
Step 2 Download the ASA CX system software from Cisco.com to an HTTP, HTTPS, or FTP server accessible
from the ASA CX management interface. If you have a Cisco.com login, you can obtain the boot
software from the following website:
http://www.cisco.com/cisco/software/release.html?mdfid=284325223&softwareid=284399946
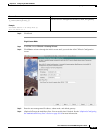
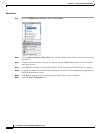
Step 3 In ASDM, choose Tools > File Management, and then choose File Transfer > Between Local PC and
Flash. Transfer the boot software to disk0 on the ASA. Do not transfer the system software; it is
downloaded later to the SSD.
Step 4 Connect to the ASA CLI, and enter privileged EXEC mode. See the “Getting Started” chapter in the
general operations configuration guide to access the ASA CLI.
Step 5 If you are replacing the IPS module with the ASA CX module, shut down and uninstall the IPS module,
and then reload the ASA:
ciscoasa# sw-module module ips shutdown
ciscoasa# sw-module module ips uninstall
ciscoasa# reload
After the ASA reloads, reconnect to the ASA CLI.
Step 6 Set the ASA CX module boot image location in ASA disk0 by entering the following command:
ciscoasa# sw-module module cxsc recover configure image disk0:file_path
Example:
ciscoasa# sw-module module cxsc recover configure image disk0:asacx-boot-9.1.1.img
Step 7 Load the ASA CX boot image by entering the following command:
ciscoasa# sw-module module cxsc recover boot
Step 8 Wait approximately 5 minutes for the ASA CX module to boot up, and then open a console session to
the now-running ASA CX boot image. The default username is admin and the default password is
Admin123.
ciscoasa# session cxsc console
Establishing console session with slot 1
Opening console session with module cxsc.
Connected to module cxsc. Escape character sequence is 'CTRL-SHIFT-6 then x'.
cxsc login: admin
Password: Admin123
Step 9 Partition the SSD:
asacx-boot> partition
....
Partition Successfully Completed
Step 10 Perform the basic network setup using the setup command according to the “Configuring Basic ASA
CX Settings at the ASA CX CLI” section on page 30-16 (do not exit the ASA CX CLI), and then return
to this procedure to install the software image.
Step 11 Install the system software from the server:
asacx-boot> system install url
Example:
The following command installs the asacx-sys-9.1.1.pkg system software.