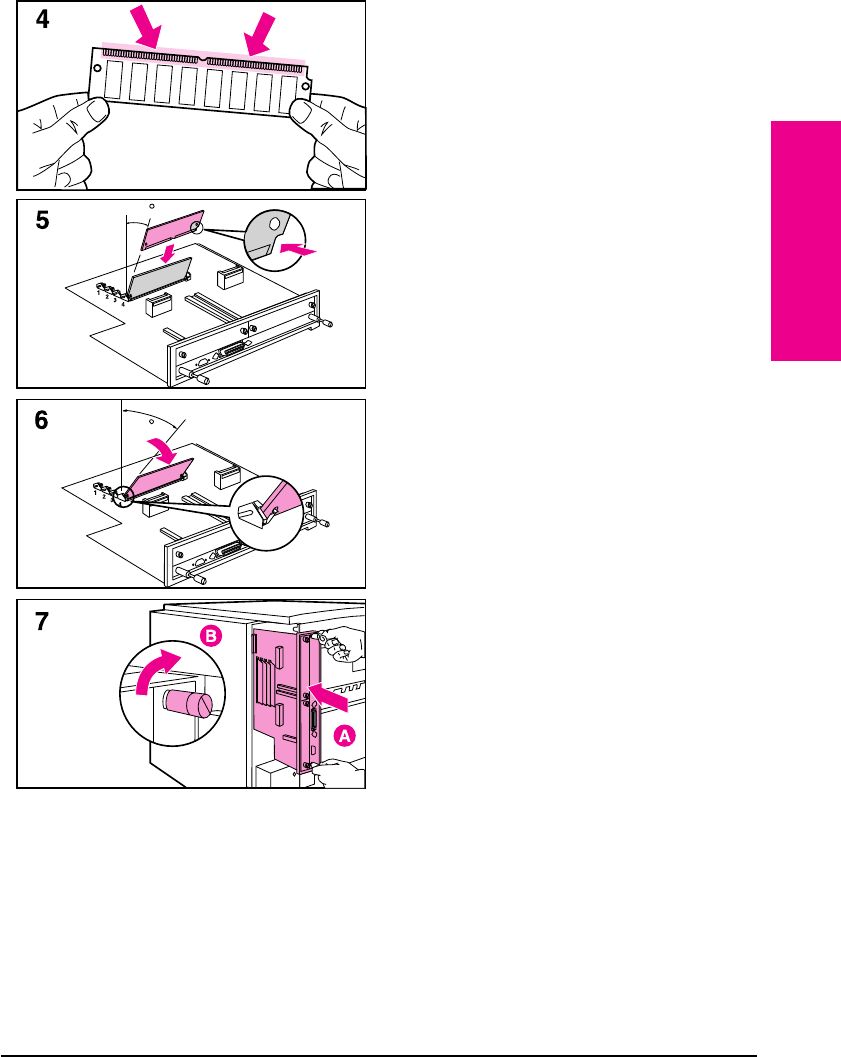
4 Remove the SIMM board from the
antistatic package. Do not touch any
component on the SIMM board. Hold
the board with your forefingers on the
side edges and your thumbs against
the back edge, so the notch on one
end is on the right and the metal teeth
face toward the SIMM slot.
5 Insert the board firmly into the SIMM
slot (5) at about a 20-degree angle.
Use the closest open slot, starting
with 4 as illustrated.
6 Rotate the SIMM toward the back of
the printer to about a 45-degree angle
until it clicks into the metal locking
tabs. If it is properly seated, it will not
lift away from the slot. (To remove a
SIMM, you must first release the
metal locking tabs.)
7 Align the printer formatter board with
the top slot, slide the board back into
the printer (A), and tighten the two
screws (B).
8
Re-attach any cables and the power
cord; then switch the printer power
ON and test the SIMM (see the
following section).
20
45
C
SIMM
Installation
EN Memory and Personality SIMM Installation C-3


