


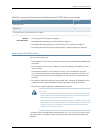
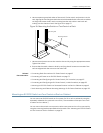

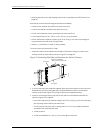

Figure 14: Attaching Rubber Feet to a Switch Chassis
Rubber feet
g027015
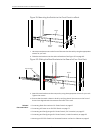
SYS
ALM
SPD
DX
POE
EN
Related
Documentation
Connecting AC Power to an EX2200 Switch on page 73•
• Connecting and Configuring an EX Series Switch (CLI Procedure) on page 87
• Connecting and Configuring an EX Series Switch (J-WebProcedure) on page 89
• Clearance Requirementsfor Airflow and Hardware MaintenanceforEX2200 Switches
on page 42
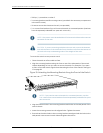
Mounting an EX2200 Switch on Two Posts in a Rack or Cabinet
You can mount the switch on two posts of a 19-in. rackor cabinet by using the mounting
bracketsprovidedwiththe switch.(Theremainderofthistopicuses“rack”tomean“rack
or cabinet”.)
Youcanmounttheswitchonfourpostsofafour-postrackbyusingthemountingbrackets
provided with the separately orderable four-post rack-mount kit. See “Mounting an
EX2200 Switch on Four Posts in a Rack or Cabinet” on page 57.
NOTE: Ifyou need to mount the switch in a recessed position on either a
two-post rack or a four-post rack, you can use the 2-in.-recess front mount
brackets provided in the separately orderable four-post rack-mount kit.
Before mounting the switch on two posts in a rack:
•
Verify that the site meets the requirements described in “Site Preparation Checklist
for EX2200 Switches” on page 33.
•
Place the rack in its permanent location, allowing adequate clearance for airflow and
maintenance, and secure it to the building structure.
•
Read “General Safety Guidelines and Warnings for EX Series Switches” on page 113,
withparticularattentionto“ChassisLiftingGuidelinesforEX2200Switches”onpage128.
•
Remove the switch from the shipping carton (see “Unpacking an EX2200 Switch” on
page 52).
Ensure that you have the following parts and tools available:
55Copyright©2010, JuniperNetworks, Inc.
Chapter8:Installing theSwitch