•
Washersand10-32x.25-in.screwstosecurethegroundinglugtotheprotectiveearthing
terminal
•
Phillips (+) screwdriver, number 2
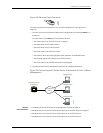
To connect earth ground to an EX4500 switch:
1. Connect one end of the grounding cable to a proper earth ground, such as the rack in
which the switch is mounted.
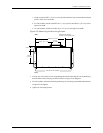
2. Place the grounding lug attached to the grounding cable over the protective earthing
terminal. See Figure 25 on page 67.
NOTE: Ifyou mounted the switch on four posts of a rack using the
four-postrack-mount kit, the protective earthing terminalon the switch
is accessible through the slot on the left rear bracket.
The protective earthing terminal on the switch mounted on four posts is
available only if the rack is 27.5in. deep through 30.5 in. deep for a switch
mounted flush with the rack front and 29.5in. deep through 32.5 in. deep
for a switch mounted 2 in. recessed from the rack front.
3. Secure the grounding lug to the protective earthing terminal with screws.
4. Dress the grounding cable and ensure that it does not touch or block access to other
switch components and that it does not drape where people could trip over it.
Connecting Earth Ground to an EX8208 Switch
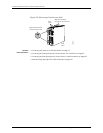
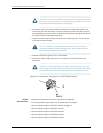
The protective earthing terminal is located on the left side of the chassis in an EX8208
switch.
An AC-powered EX Series switch chassis gets additional grounding when you plug the
power supply in the switch into a grounded AC power outlet by using an AC power cord
appropriate for your geographical location. See AC Power Cord Specifications for an
EX8200 Switch.
Ensure that you have the following parts and tools available:
•
Grounding cable for your EX8208 switch—The grounding cable must be 6 AWG
(13.3 mm²), minimum 60°C wire, or as permitted by the local code.
•
Grounding lug for your grounding cable. See Grounding Cable and Lug Specifications
for EX8200 Switches.
•
Washersand¼-20x.75-in.screwstosecurethegroundinglugtotheprotectiveearthing
terminal
•
Phillips (+) screwdriver, number 2
To connect earth ground to an EX8208 switch:
71Copyright© 2010,JuniperNetworks,Inc.
Chapter10:Connectingthe Switch


