


2-1
v1.0, January 2010
Chapter 2
Using the Setup Wizard to Provision the UTM in
Your Network
Understanding the Steps for Initial Connection
Typically, the UTM is installed as a network gateway to function as a combined LAN switch,
firewall, and content scan engine in order to protect the network from all incoming and outgoing
malware threats.
Generally, five steps are required to complete the basic and security configuration of your UTM:
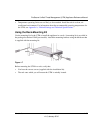
1. Connect the UTM physically to your network. Connect the cables and restart your network
according to the instructions in the installation guide. See the ProSecure Unified Threat
Management UTM Installation Guide for complete steps. A PDF of the Installation Guide is
on the NETGEAR website at http://prosecure.netgear.com or
http://kb.netgear.com/app/home.
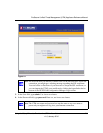
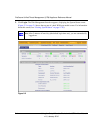
2. Log in to the UTM. After logging in, you are ready to set up and configure your UTM. See
“Logging In to the UTM” on page 2-2.
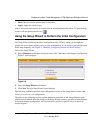
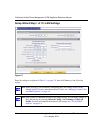
3. Use the Setup Wizard to configure basic connections and security. During this phase, you
connect the UTM to one or more ISPs (more than one ISP applies to dual-WAN port models
only). See “Using the Setup Wizard to Perform the Initial Configuration” on page 2-7.
4. Verify the installation. See “Verifying Proper Installation” on page 2-26.
5. Register the UTM. “Registering the UTM with NETGEAR” on page 2-26.
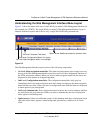
Each of these tasks is described separately in this chapter. The configuration of the WAN mode
(required for dual-WAN port models only), dynamic DNS, and other WAN options is described in
Chapter 3, “Manually Configuring Internet and WAN Settings.”
The configuration of LAN, firewall, scanning, VPN, management, and monitoring features is
described in later chapters.