


February 2003 3-15
1000-A2-GN22-00 3. Installing the CPX-1000
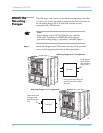
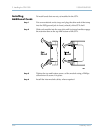
Step 1 Mark the rack for the location of each CPX shelf. Also mark the
shelf for optional STS-1 Splitter Assembly above each unit.
Step 2 With the help of another person, lift the shelf into position through
the front of the shelf.
Step 3 Using a flat-blade screwdriver, secure each flange with four 12-
24
-inch pan head screws to fasten the shelf to the rack.
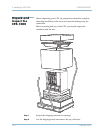
Step 4 Reinstall the power supply/fan modules.
Step 5 Repeat these steps for each shelf to be mounted in the rack.
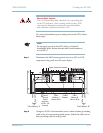
Caution
To help reduce risk of injury while lifting the shelf, reduce the
shelf weight by removing the power supply/fan modules.
When the shelf is in place, reinstall the modules.
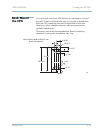
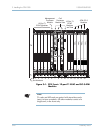
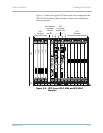
0071
Pull To RemoveLoosen Retaining Screws
Power Supply/Fan Modules
O
U
T
O
F
S
E
R
V
IC
E
IN
S
E
R
V
IC
E
O
U
T
O
F
S
E
R
V
IC
E
IN
S
E
R
V
IC
E
O
U
T
O
F
S
E
R
V
IC
E
IN
S
E
R
V
IC
E
1
2
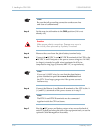
Caution
Insert the power supply/fan module with a single, steady
motion.
If the power supply does not easily slide into the slot, back
the module out and re-insert it Do not force the power supply
into the shelf as you may bend the power supply pins.