


February 2003 3-35
1000-A2-GN22-00 3. Installing the CPX-1000
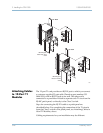
In most cases, you should change the IP address of the CPX to one
that can be detected by the network management software on your
LAN. After you change the IP address, the CPX requires rebooting.
To change its default IP address, refer to the JetVision User’s Guide.
Verify CPX LAN
Connection
Validate the cable connections to the CPX Ethernet LAN port by
conducting a ping test:
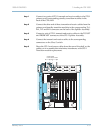
Step 1 Verify that the MP Transition card is connected to the LAN hub or
router, using a straight-through cable.
Step 2 Ping the CPX from a PC on the same LAN as the CPX.
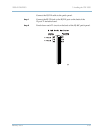
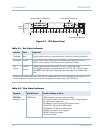
Step 3 At the MP Transition card, verify that the Ethernet green (LINK)
indicator is lit
and the amber (ACTivity) indicator blinks rapidly
during the test. (to indicates that the card is receiving and
responding to the ping query data packets.)
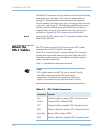
Provision the
CPX-1000
Refer to the JetCraft User’s Guide while using JetCraft to perform
the following tasks:
Configure the CPX modules and ports
Check the CP module redundancy and learn to perform an
administrative switchover
Check the ATM redundancy and learn to perform an ATM
administrative switchover
Learn to reboot the MP and CP modules
Provision GR-303 Interface Groups
Provision Protection Groups