


Installing Printer Software in Windows
11
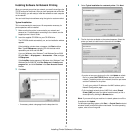
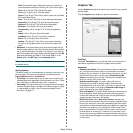
Reinstalling Printer Software
You can reinstall the software if installation fails.
1
Start Windows.
2
From the
Start
menu select
Programs
or
All Programs
→
your
printer driver name
→
Maintenance
.
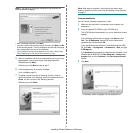
3
Select
Repair
and click
Next
.
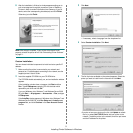
4
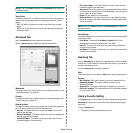
The list of printers available on the network appears. Select the
printer you want to install from the list and then click
Next
.
•If you do not see your printer on the list, click
Update
to refresh
the list, or select
Add TCP/IP Port
to add your printer to the
network. To add the printer to the network, enter the port name
and the IP address for the printer.
•To find a shared network printer (UNC Path), select
Shared
Printer [UNC]
and enter the shared name manually or find a
shared printer by clicking the
Browse
button.
You will see a component list so that you can reinstall any item
individually.
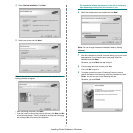
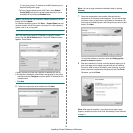
NOTE
: If your printer is not already connected to the computer, the
following window will appear.
• After connecting the printer, click
Next
.
• If you don’t want to connect the printer at this time, click
Next
, and
No
on the following screen. Then the installation will start and a test page
will not be printed at the end of the installation.
•
The reinstallation window that appears in this User’s Guide may
differ depending on the printer and interface in use.
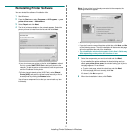
5
Select the components you want to reinstall and click
Next
.
If you installed the printer software for local printing and
you
select
your printer driver name
, the window asking you to print a
test page appears. Do as follows:
a. To print a test page, select the check box and click
Next
.
b. If the test page prints out correctly, click
Yes
.
If it doesn’t, click
No
to reprint it.
6
When the reinstallation is done, click
Finish
.