


67 _Faxing (Optional)
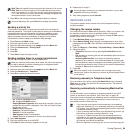
Setting up a fax phonebook using SyncThru™ Web
Service
You can store fax numbers conveniently from the networked computer
using SyncThru™ Web Service.
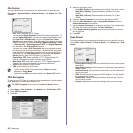
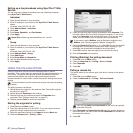
Individual
1. Open the web browser in your computer.
2. Enter IP address of your machine, then SyncThru™ Web Service
shows.
(Example. http://123.123.123.123)
3. Press Address Book > Individual.
4. Press Add.
5. Enter Name, Speed No., and Fax Number.
6. Press Apply.
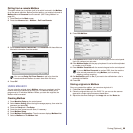
Group
1. Open the web browser in your computer.
2. Enter IP address of your machine, then SyncThru™ Web Service
shows.
(Example. http://123.123.123.123)
3. Press Address Book > Group.
4. Press Add Group.
5. Enter Group Name and Speed No..
6. Add individual ddresses to the fax group.
7. Press Apply.
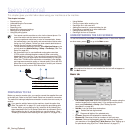
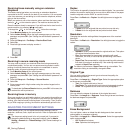
USING THE POLLING OPTION
Polling is used when one fax machine requests another to send a
document. This is useful when the person with the original document is not
in the office. The person who wants to receive the document, calls the
machine holding where the original is stored and requests that the
document be sent. In other words, it "polls" the machine holding that has the
original.
The polling process is as follows:
1. Sender stores the originals in the machine. (See "Storing the originals
for polling" on page 67.)
2. Sender gives the Passcode to the receiver.
3. Receiver dials the fax number and enters the Passcode when
requested. (See "Polling a remote fax" on page 67.)
4. Receiver presses Start to receive the stored fax.
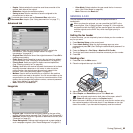
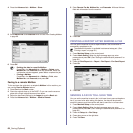
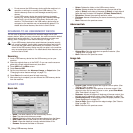
Storing the originals for polling
1. Press Fax from the Main screen.
2. Place the originals face up in the DADF. Or you can use the scanner
glass with a single original document, face down.
3. Adjust the document settings in the Image tab and the Basic tab.
4. Press the Advanced tab > Polling > Store.
5. Press the input area then the pop up keyboard, enter Passcode (The
four-digit number which you have to inform the receiver). If you do not
want to set Passcode, enter number 0000 here. Then you can store,
delete, print and receive a fax for polling without any passcode.
6. Select the Delete On Poll option. If you select Off, the sent fax data will
be remained in the machine’s memory even after it’s printing. If you
select On, the fax data will be deleted at the printing point.
7. Press OK to start to store the originals into memory for polling.
8. Give the Passcode to the receiver.
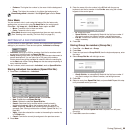
Printing (Deleting) the polling document
1. Press Fax from the Main screen.
2. Press the Advanced tab > Polling > Print (or Delete).
3. Enter Passcode
4. Press OK.
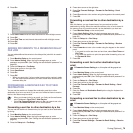
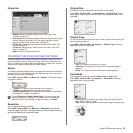
Polling a remote fax
This option allows you to retrieve (poll) a fax which is stored in the remote
machine.
1. Press Fax from the Main screen.
2. Press the Advanced tab > Polling > Poll from Remote.
3. Enter Passcode and Destination Fax No using the number keypad on
the control panel. You have to be informed Passcode from sender with
the remote fax machine.
4. Press OK.
Speed Dial numbers can be imported from an *.csv file.
To use this feature, both the sender and receiver must have the polling
feature.
If you want to use the Mailbox, refer to Storing the originals in the
Mailbox. (See "Storing originals in Mailbox" on page 68.)
Your can use Delay Poll From Remote to poll the fax at a specific
time within 24 hours.