


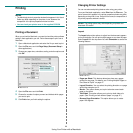

Using Your Printer in Linux
39
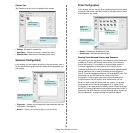
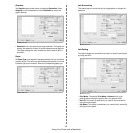
The document is scanned and the image preview appears in the
Preview Pane.
7
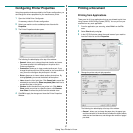
Change the scan options in the Image Quality and Scan Area
sections.
•
Image Quality
: allows you to select the color composition and
the scan resolution for the image.
•
Scan Area
: allows you to select the page size. The
Advanced
button enables you to set the page size manually.
If you want to use one of the preset scan option settings, select
from the Job Type drop-down list. For details about the preset Job
Type settings, see page 39.
You can restore the default setting for the scan options by clicking
Default
.
8
When you have finished, click
Scan
to start scanning.
The status bar appears on the bottom left of the window to show
you the progress of the scan. To cancel scanning, click
Cancel
.
9
The scanned image appears in the new Image Manager tab.
If you want to edit the scanned image, use the toolbar. For further
details about editing an image, see page 39.
10
When you are finished, click
Save
on the toolbar.
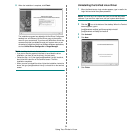
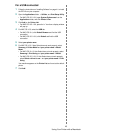
Drag the pointer to set
the image area to be
scanned.
11
Select the file directory where you want to save the image and
enter the file name.
12
Click
Save
.
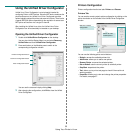
Adding Job Type Settings
You can save your scan option settings to retrieve for a later scanning.
To save a new Job Type setting:
1
Change the options from the Scanner Properties window.
2
Click
Save As
.
3
Enter the name for your setting.
4
Click
OK
.
Your setting is added to the Saved Settings drop-down list.
To save a Job Type setting for the next scan job:
1
Select the setting you want to use from the Job Type drop-down
list.
2
The next time you open the Scanner Properties window, the saved
setting is automatically selected for the scan job.
To delete a Job Type setting:
1
Select the setting you want to delete from the Job Type drop-down
list.
2
Click
Delete
.
The setting is deleted from the list
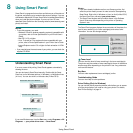
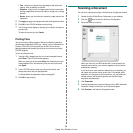
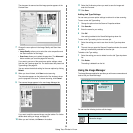
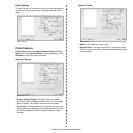
Using the Image Manager
The Image Manager application provides you with menu commands and
tools to edit your scanned image.
You can use the following tools to edit the image:
Tools Function
Saves the image.
Use these tools to
edit the image.