


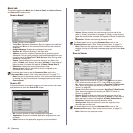


59 _Scanning
File Format
You can select the file format before you proceed with the scanning job.
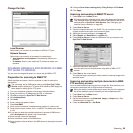
Press Scan > Scan to Email (Or Scan to Server) > the Output tab > File
Format.
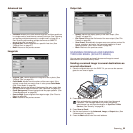
• PDF: Scans originals in PDF format.
You can add a Digital Signature to the PDF with the certification. To
add the Digital Signature, you have to create the certification from
the SyncThru™ Web Service. Log in to the SyncThru™ Web
Service as an administrator. (See "Managing your machine from the
website" on page 99.) And click Setting > Machine Settings > Scan
> Scan Security > Digital Signature in PDF.The Digital Signature
can be used in the Scan to Server feature.
You also can create a PDF Encryption that is encrypted to protect
the contents from unauthorized access. You can set the encryption
level, password, and access permission such as reading, printing, or
modifying, etc. The PDF Encryption can be used in the Scan to
Server feature. (See "PDF Encryption" on page 59.)
• Single-Page TIFF: Scans originals in TIFF (Tagged Image File
Format), but several originals are scanned as one file.
• Multi-Page TIFF: Scans the originals in TIFF (Tagged Image File
Format), and several originals are scanned as several file.
• JPEG: Scans original in JPEG format.
• XPS: Scans original in XPS format.
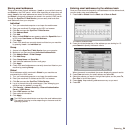
PDF Encryption
To encrypt your PDF files, you need to set up parameters for the encryption
level, password, and access permission, etc.
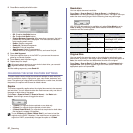
1. Press Scan > Scan to Server > the Output tab > File Format > PDF.
2. Press PDF Encryption.
3. Press On.
4. Select an encryption level.
• Low (RC4, 40 bits): Recommended for Acrobat 3.0 or later version.
• High (RC4, 128 bits): Recommended for Acrobat 5.0 or later
version.
• High (AES, 128 bits): Recommended for Acrobat 7.0 or later
version.
5. Enter the Owner Password to get a whole right about the PDF.
6. Enter the User Password to get an Access Permission set by the
Access Permission menu below.
7. Set the Access Permission in printing or modifying. This configuration
will affect the users accessed with the User Password.
8. Check Extract text and graphics to give users permission to extract
text or graphics.
9. Press OK.
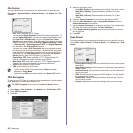
Scan Preset
This feature allows you to use optimized settings for your specific scan job.
Press Scan > Scan to Email (Or Scan to Server) > the Output tab > Scan
Preset.
• Sharing and Printing: Produces a small-sized file for normal quality
documents.
• High Quality Printing: Set this option for high quality output with the
largest file size.
• Archival Record: For the electronic file which is of the smallest file
size of the output.
• OCR: Produces scanned output for OCR software. You can expect
the highest quality images.
• Simple Scan: Used for a simple document with text only. The file
size of output is small.
• Custom: Applies the current scan settings that you have chosen.
• The file format JPEG cannot be selected if Mono has been
selected for Color Mode.
• The file format XPS cannot be showed in the Scan to PC mode.
The PDF Encryption can be used in the Scan to Server feature.