


57 _Scanning
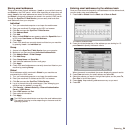
5. Press On to enable job build function.
• Off: Disables Job Build feature.
• On: Enables Job Build feature.
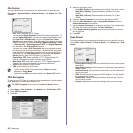
• Display Between Segments: After executing a segment, the job is
paused with this screen is displayed. Then the user can select to
keep sending email or stop.
• Delete: Deletes a segment.
• Delete All: Deletes all segments.
• Send All: Prints all segments.
• Add Segment: Adds a new segment.
• Cancel: Remove all segments in the list, and cancel the job.
6. Press Add Segment.
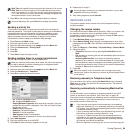
7. Place the originals face up in the DADF or you can use the scanner
glass for one sheet of paper.
8. Press Start to start the scanning job.
9. Repeat step 6 to step 8.
10. After adding segments, press Send All.
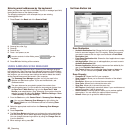
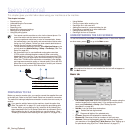
CHANGING THE SCAN FEATURE SETTINGS
This part explains how to adjust the document settings for each scan job,
such as resolution, duplex, original size, type, color mode, darkness, and
more. The options you change will be maintained for a certain time, but after
that period, the options will be reset to default values.
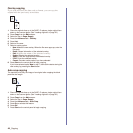
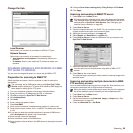
Duplex
This feature especially applies when the original documents to be scanned
are two-sided. You can select whether the machine scans only one side of
the paper or both sides of the paper.
Press Scan > Scan to Email (Or Scan to Server) > the Basic tab >
Duplex. Use left/right arrows to toggle the values.
• 1 Sided: For originals that are printed on one side only.
• 2 Sided: For originals that are printed on both sides.
• 2 Sided, Rotate Side 2: For originals that are printed on both sides.
But the back is rotated 180 degrees.
Resolution
You can adjust document resolution.
Press Scan > Scan to Email (Or Scan to Server) > the Basic tab >
Resolution. Use left/right arrows to toggle the values. The higher value you
select the clear result you get. But the scanning time may take longer.
100, 200, 300 dpi resolution is available only when Color Mode is set to
Color or Gray. The following table shows detailed information feature,
resolution and file format options.
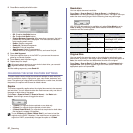
Original Size
You can specify the scanning area on the originals by selecting the pre-
defined size, or putting in the margin value or
Auto
. If you set this option to
Auto
, the machine senses and determines the size of the original.
Press Scan > Scan to Email (Or Scan to Server) > the Advanced tab >
Original Size. Use up/down arrows to go to the next screen. Select the
appropriate option and press OK.
As long as space remains on your device's hard drive, you can add
segments without any restriction.
To use 2 Sided and 2 Sided, Rotate Side 2, you have to load the
originals on the DADF. Because, if the machine can not detect the
original on DADF, automatically changes the option to 1 Sided.
FEATURE RESOLUTION (DPI) FILE FORMAT
Scan to Email 100, 200, 300, 400,
600
PDF, Single-Page TIFF,
Multi-Page TIFF, JPEG
Scan to PC 100, 200, 300, 400,
600
PDF, TIFF, JPEG
Scan to Server 100, 200, 300, 400,
600
PDF, Single-Page TIFF,
Multi-Page TIFF, JPEG