2-61
Setting User Preferences
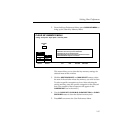
4. Use the DIM PVW button to assign one of the Dim Preview
modes to the selected keyer, as follows:
ALL KEYERS — Causes the preview of all keyers using a
mask on that M/E or DSK to dim on the Preview monitor.
DELEG KEYER — Causes only the preview of the keyer
that is currently delegated and inserting a mask on that
M/E or DSK to dim on the Preview monitor.
OFF — Turns off the preview dim function so that the
preview never dims on that M/E or DSK regardless of
masking.
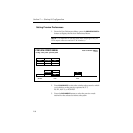
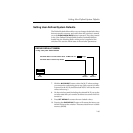
5. Press the PUSH TO PVW button to enable/disable the push-to-
preview mode for the entire switcher. Hold down the key
delegate button (for example
KEY 1 or KEY 2 on the Keyer
panel) of the appropriate keyer for 1/2 second or more to
display the M/E look-ahead preview along with the selected
keyer output on the switched preview monitor.
When the key delegate button is released, the preview display
remains on for a programmed time-out period, as set by the
PUSH TO PREVIEW TIMEOUT
soft knob, before reverting to its
original state.
PUSH TO PREVIEW TIMEOUT — Sets how long the
preview will remain on after you have released the key
delegate button. The default value for the auto preview
timeout is 3 seconds. Any adjustments to clip or gain
resets the time-out, thus maintaining the auto preview
mode while making clip and gain adjustments.
6. Press the EXIT button to return to the User Preferences Menu.


