


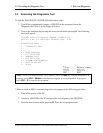


3.2 Executing the Diagnostic Test 3 Tests and Diagnostics
3.2 Executing the Diagnostic Test
To start the DIAGNOSTIC PROGRAM, follow these steps:
1. Turn off the computer and connect a USB FDD to the computer. Insert the
Diagnostics disk (No.1) in the floppy disk drive.
2. Turn on the computer by pressing the power switch while pressing U. The following
menu will appear:
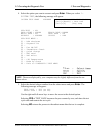
TOSHIBA Personal Computer XXXXXX DIAGNOSTICS
version X.XX (C) Copyright TOSHIBA Corp. 20XX
DIAGNOSTICS MENU :
1 - DIAGNOSTIC TEST
2 -
3 -
4 - HEAD CLEANING
5 - LOG UTILITIES
6 - RUNNING TEST
7 - FDD UTILITIES
8 - SYSTEM CONFIGURATION
9 - EXIT TO MS-DOS
0 - SETUP
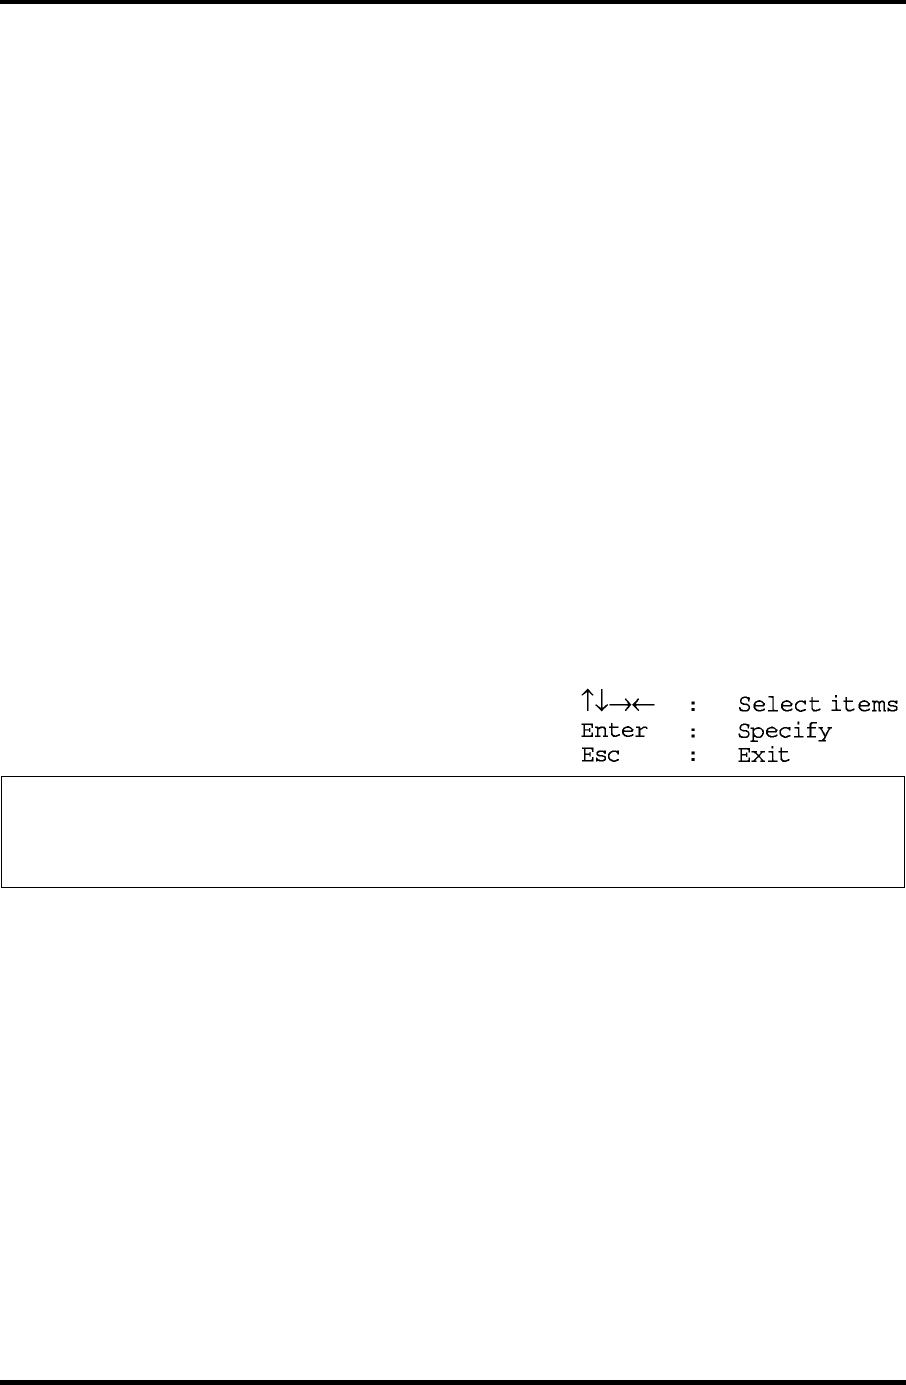
NOTE: To exit the DIAGNOSTIC TEST MENU, press the Esc key. If a test program is in
progress, press Ctrl + Break to exit the test program. If a test program is in progress,
press Ctrl + C to stop the test program.
* When no built-in FDD is mounted, begin the test program in the following procedure:
1. Turn off the power of the PC.
2. Connect a USB FDD to the PC and insert the test program in the USB FDD.
3. Press the power button while pressing U. Then, the test program starts.
Satellite A10/TECRA A10/Satellite Pro A10 Maintenance Manual (960-445) 3-3