


4.16 LCD Unit/FL Inverter 4 Replacement Procedures
Installing the FL Inverter/LCD Unit
The following describes the procedure for installing the LCD unit/FL inverter (See Figure 4-
34 to 4-36).
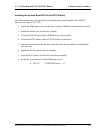
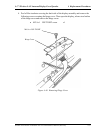
1. Secure the LCD brackets to the LCD module with the following screws.
• M2x3 SUPER THIN BIND screw x4
2. Set the LCD module on the display cover.
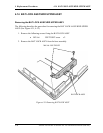
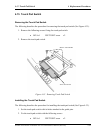
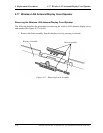
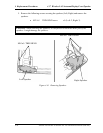
3. Connect two cables to the connectors CN1 and CN2 on the FL inverter. Stick the
insulator on the FL inverter and secure the FL inverter with the following screw.
• M2x4 SUUPER THIN BIND screw x1
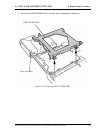
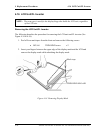
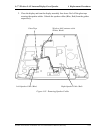
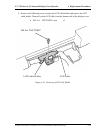
4. Stand the LCD unit on the display cover and connect the LCD cable to the back of the
LCD. Fix it with the glass tape.
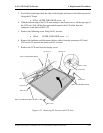
5. Fix the LCD unit to the display cover with the following screws.
• M2x4 SUPER THIN BIND screw x4
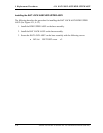
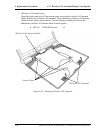
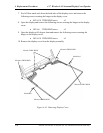
6. Install the display mask and engage the latches.
NOTE: When installing the display mask, make sure there is no gap between the display
mask and the display cover.
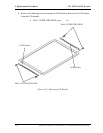
7. Secure the display mask with the following screws and stick two mask tapes on the
front of the display mask.
• M2.5x8 THIN BIND screw x2
Satellite A10/TECRA A1/Satellite Pro A10 Maintenance Manual (960-445) 4-53