


06_ContScanProcedure.fm Modified: 8/7/02
Template Version 1.0
GL-1020 Scan Operator’s Guide 43
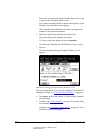
Note: If you are using the Automatic Document Feeder, the
Scan Settings Summary screen displays “ADF” in the scan
settings summary area.
If you are placing the originals on the glass, the Scan Settings
Summary screen displays “Glass” and the auto detected
original size in the scan settings summary area.
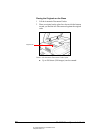
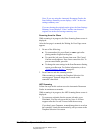
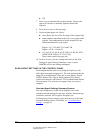
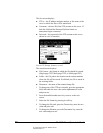
Scanning from the Glass
While scanning is in progress, the Glass Scanning Status screen is
displayed.
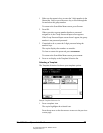
After the last page is scanned, the Waiting for Next Page screen
appears.
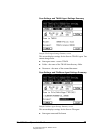
1 Do one of the following:
n To scan another job, press SCAN! or START again after
placing another original on the glass.
n To cancel the job, press CANCEL JOB or FC. The Cancel
Confirm screen appears. Press
YES to cancel the Job. To
prevent cancellation, press
NO.
n To change the scan settings in the Scan Parameter Setting
screen, press
SETTING. For further information, refer to
“
Scan Parameter Settings” on page 45.
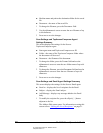
2Press
FINISH to end this scanning session.
When scanning is complete, the Template Selection List
screen appears. Scanned image data is saved on the
controller’s hard disk.
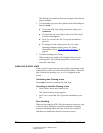
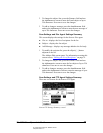
ADF Scanning
Follow the steps in this section to use the Automatic Document
Feeder in continuous scan mode.
While scanning is in progress, the ADF Scanning Status screen is
displayed.
1 To scan more originals after the current job ends, press
C
ONTINUE. You can only press this key once. It will not
reappear after the first use. Proceed with the next step.
If you don’t press
CONTINUE, scanned image data is saved on
the controller’s hard disk automatically, and you return to the
Template Selection List screen.