


06_ContScanProcedure.fm Modified: 8/7/02
Template Version 1.0
GL-1020 Scan Operator’s Guide 51
WORKING WITH THE ADDRESS BOOK
You can alter the list of recipients defined in a template, update
Email addresses, display address book groups, and search for
entries in the address book.
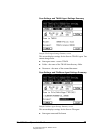
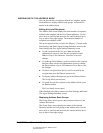
Editing the List of Recipients
The Address Edit screen displays the total number of recipients
defined in the template and the list of Email addresses. Use the
arrow keys to scroll up and down the list, and the double arrow
keys to move from page to page. The maximum number of
recipients per template is 400.
This screen appears when you press the ellipsis [...] button on the
Scan Settings and Email Agent Settings Summary screen or the
Scan Settings and iFax Agent Settings Summary screen
n To add a recipient to the list, press NEW and use the
alphanumeric screen to enter the new recipient’s Email
address of up to 256 characters. Press
SET to save the
changes.
n To update an Email address, scroll or search for the recipient
then press
EDIT and use the alphanumeric screen to change
the Email address of up to 256 characters. Press
SET to save
the changes.
n To delete a recipient from the list, scroll or search for the
recipient then press the
DELETE button twice.
n To display Address Book groups, press the GROUPS button.
The Group Select screen opens.
n To search for specific recipients in the Address Book, press
the
SEARCH button.
The User Search screen opens.
When finished press
OK to return to the Scan Settings and Email/
iFax Agent Settings Summary screen.
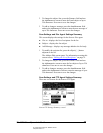
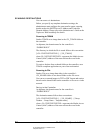
Displaying Address Book Groups
The Group Select screen opens when you press
SEARCH on the
Address Edit screen.
The Group Select screen displays the name of the selected
Directory and the list of all groups in the address book. Use the
arrow keys to scroll up and down the list, and the double arrow
keys to move from page to page.