


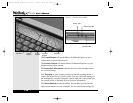
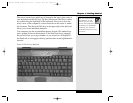

these buttons by using the Synaptics controls built into your system.
See the section below on pointing devices for more information.
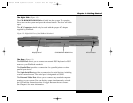
The Scroll Button located just below the mouse buttons allows you
to scroll through programs that support the scrolling function. See the
section below on pointing devices for more information.
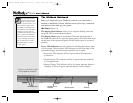
Power On
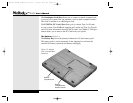
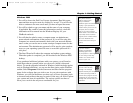
Before starting your system, you should remove the battery from the
box and install it in your system. Carefully turn the unit upside down.
Place the front edge of the battery into the grooves at the front edge of
the system. Gently angle the battery into place and push down on the
battery until you hear it “click” into position.
The first time you use your WinBook notebook, use your AC power
adapter. This will allow your battery to fully charge. It is recommended
that you fully charge and discharge your battery 3 times. This will help
calibrate the electronics that monitor and maintain the battery charge.
After those three full discharges, you can partially discharge or charge
your system as your use demands, although you should allow a full
discharge/recharge periodically to help optimize battery life. See Chapter
3 for more information on conditioning and maintaining your battery
efficiency.
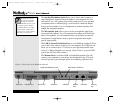
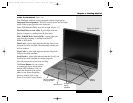
Connect your AC Adapter to your system. Connect the power cord to
the adapter and connect the cord to a wall outlet or power strip. Slide the
display panel release latches forward and gently lift the display panel until
it is fully vertical. Press the power button on your computer to initiate a
boot of the system.
During this first setup, you can click on the Next button to move to the
next step. Clicking on the Back button allows you to return to the previous
step and review the information entered during that step.
1.11
Chapter 1: Getting Started
X Manual WinME w/photos 2/01/01 3/19/01 4:23 PM Page 21