


2. The disc tray opens.
3. Wait until the tray stops. If the tray does not open far enough to insert
the CD, gently ease the tray out until you have enough clearance to
insert the CD.
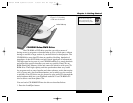
4. Carefully place the CD (audio or data), with the label side up, on the
disc tray. (Figure 1.12)
5. Be sure to carefully center the CD and press it into place on the loading
tray. Since your WinBook notebook is meant to be portable, the CD is
secured onto the tray rather than simply resting in a recess.
6. Close the tray. Be certain that it is closed completely.
In general, your software will control the CD-ROM directly. Data CDs
are accessed via the software. Consult your software instructions for the
operations of a data CD. Windows compatible CD-ROMs will usually
have an autoplay feature that starts the program when the CD is detected.
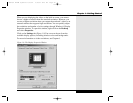
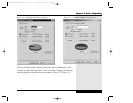
When the CD-ROM is to be used as an audio CD player, you can still
use software to control the playing and volume of the CD. To adjust the
volume of an audio CD playing in Windows, you can single click (brings
up the volume slide) or double-click (brings up the entire audio mixer
window) on the speaker icon beside your clock.
If you need to open the CD drawer when the power is not on, you can
use the emergency release, which is the small hole located on the front of
the drive to the right of the release button. Use a paper clip to press on the
release inside the hole. The tray can then be pulled gently forward until the
disc can be retrieved. Slide the tray back into place until you feel it click.
This method is designed to be used occasionally for an emergency retrieval
of a disk and should not be used as a regular method of removing disks.
Your drive will last longer if you remove the disk using the normal unload-
ing method.
Series
User’s Manual
1.24
X Manual WinME w/photos 2/01/01 3/19/01 4:23 PM Page 34