


VLANs
176 Avaya Integrated Management Release 4.0.1 Software Update Manager
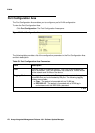
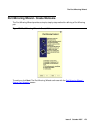
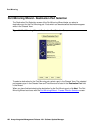
Using the Port Configuration Area
To configure the VLAN setting for ports on the device using the Port Configuration Area:
1. Click Port Configuration. The Port Configuration Area opens.
2. Select the ports you want to configure in the Tree View, Chassis View, or VLAN Tree. The
settings that are common to all of the selected ports appear in the fields in the Port
Configuration Area. For information on selecting ports, refer to “Selecting Ports” on
page 175.
3. Change the settings in the Port Configuration Area using the pull-down lists and
checkboxes. For information on the settings in the Port Configuration Area, refer to “Port
Configuration Area” on page 170. The VLAN configuration for the selected ports is
changed.
Note:
Note: When changing the PVID of the selected ports, the ports do not appear selected
in the VLAN Tree. However, the ports remain in the Selection List.
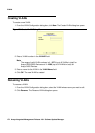
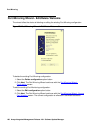
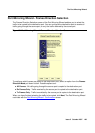
Configuring VLANs Using Drag-and-Drop
To configure the PVID of ports using drag-and-drop:
1. Select the ports you want to configure in the Tree View, Chassis View, or VLAN Tree. For
information on selecting ports, refer to “Selecting Ports” on page 175
.
2. Drag the ports until they are over a VLAN icon in the VLAN Tree. The ports are added to the
desired VLAN.
Note:
Note: When dragging ports from the VLAN Tree, only ports represented by PVID
symbols are added to the desired VLAN. Dragged static binding icons are
ignored and do not change port PVIDs.
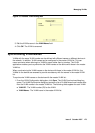
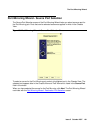
Updating the Device
Ports whose VLAN information has changed appear dimmed in the VLANs table. To update the
device with the changes, click Apply.
For more information on the user interface, refer to “Using Dialog Boxes and Tables” on
page 32.