Chapter 3 Disassembly and Maintenance
3-6. Adjustments
3-53 CL-S700/CL-S703/CL-S700R
3-6-3. Ribbon Skew Adjustment
This adjustment may be necessary in the following case.
- When the “Unit, Head” is replaced
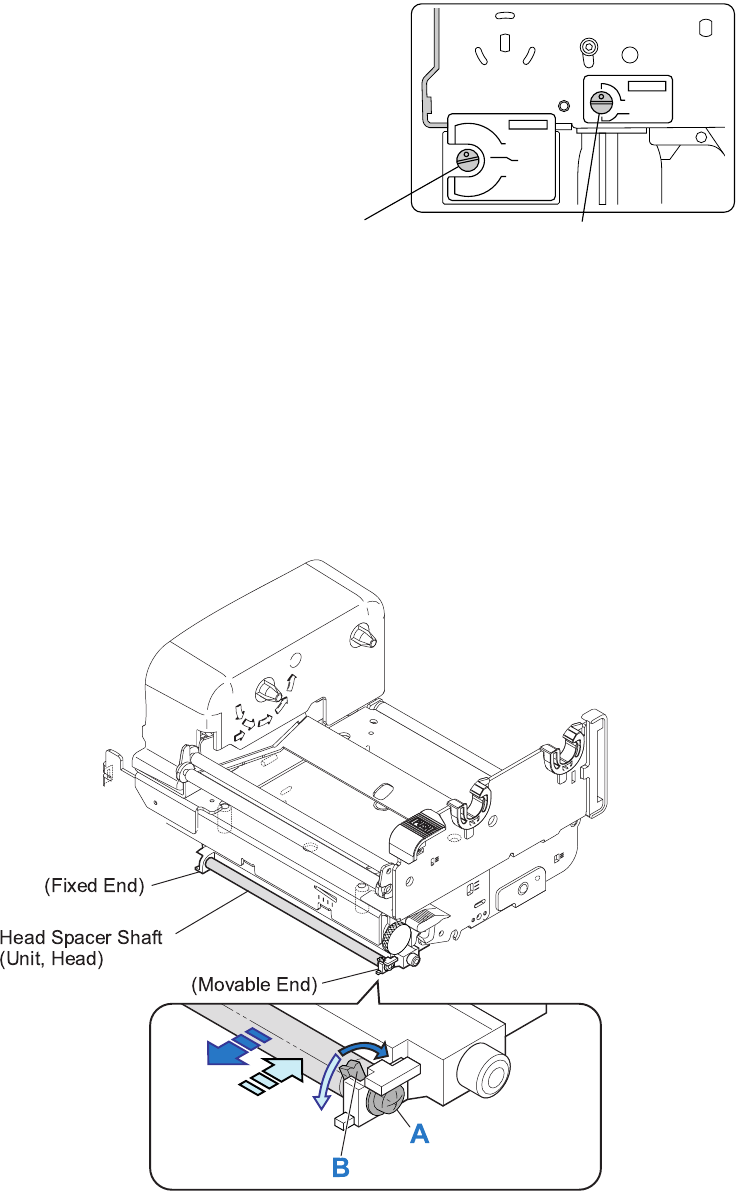
Normally, ribbon wrinkles can be removed by
adjusting the adjust screws of the “Unit, Ribbon
Frame L”. (Refer to the figure on the right.)
If ribbon wrinkles cannot be removed with these
screws, perform the ribbon skew adjustment as
follows:
Ribbon skew adjustment procedure:
Remove ribbon wrinkle by moving the right end (movable end) of the Head Spacer Shaft (a part of
the “Unit, Head”) as follows: (Left end is a fixed end.)
1. Loosen (not remove) the screw “A” of the Head Spacer Shaft.
2. Turn the lever “B” clockwise or counterclockwise to move the right side end of the Head Spacer
Shaft forward or backward to remove ribbon wrinkles. Refer to the figure below.
Also, refer to the figure on the next page to understand the ribbon skew adjustment
mechanism.
3. After adjustment, tighten the screw “A”.
TENSION
STANDARD
LOW
TENSION
STANDARD
LOW
SUPER LOW
Adjust screw for Take-up side
ribbon tension adjustment
Adjust screw for Supply side
ribbon tension adjustment
[On the left side of the Unit, Frame Ribbon L]


