


Chapter 3 Disassembly and Maintenance
3-6. Adjustments
CL-S700/CL-S703/CL-S700R 3-58
12) Remove the “Ribbon-tension spring adjust ribbon (φ80mm)” and reset the “Ribbon-tension
adjust ribbon (φ60mm)”.
13) Hook a spring gauge of 500gf on the “Ribbon-tension adjust ribbon (φ60mm)” and slowly
pull the ribbon end downward at a constant speed (approx. 7.5cm/sec. or so). Then, check
if the reading of the spring gauge in the steady state is within 450 +/- 50gf.
If the reading is out of the specified range, repeat above sub steps 4) through 11).
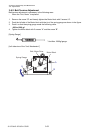
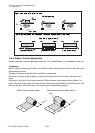
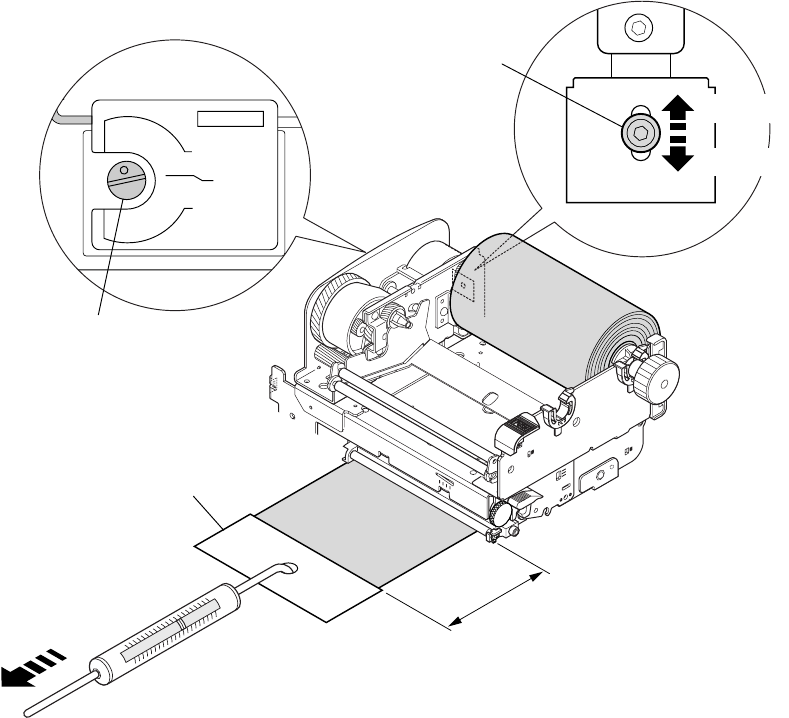
5. Ribbon Tension Check/Adjustment on Supply Side:
1) Set the “Adjust screw for Supply side ribbon tension adjustment” to “STANDARD” position.
2) Set the “Ribbon-tension adjust ribbon (φ60mm)” to the supply side ribbon holder.
3) Hook a spring gauge of 500gf on the “Ribbon-tension adjust ribbon” and horizontally pull
the ribbon end toward you at a constant speed (approx. 7.5cm/sec. or so).
When the ribbon is drawn approx. more than 20cm, suddenly load applies to the spring
gauge. With this load condition, check if the reading of the spring gauge is within 400 +/-
50gf.
4) If the reading is in the specified range, no tension adjustment on supply side is required. In
this case, proceed to step 6. If not, proceed to the next sub step.
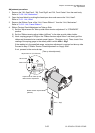
5) Apply ThreeBond 1401B to the Adjust screw “D” after removing it. Then, loosely tighten the
Adjust screw “D” with a hex wrench and leave the hex wrench on the Adjust screw “D”.
6) While repeating above sub step 3), adjust the position of Adjust screw “D” by moving hex
wrench up and down so that the reading of spring gauge is within 400 +/- 50gf.
TENSION
STANDARD
LOW
SUPER LOW
Adjust screw for Supply side
ribbon tension adjustment
400 +/- 50gf
Approx. 20cm
Ribbon-tension adjust ribbon (φ60mm)
Adjust screw "D"
(For Service)
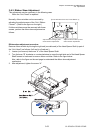
[Supply side adjustment]
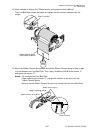
When strong
When weak