Chapter 3 Disassembly and Maintenance
3-5. Disassembly, Reassembly and Lubrication
3-19 CL-S700/CL-S703/CL-S700R
Notes on reassembling:
• Fit the holes in the chassis of the “Unit, Mechanism” to the protrusions of the “SA, Case L” to
securely seat the “Unit, Mechanism” onto the “SA, Case L”.
• Securely fasten the earth wire with the screw (8PH (SW+PW), M3x5).
• Install the Power Switch as shown in the figure (set its “l (ON)” side to the right).
• When assembling the “SA, Front Center”, assemble it so that its claws “A” shown in the figure
are securely inserted into the slits “B” on the “SA, Case L”.
• See the following wiring route for “Unit, Mechanism” and pass the cables (J4 to J9, J21 and J22)
through the “Clamp, Main Cable”.
[Wiring route for “Unit, Mechanism”]
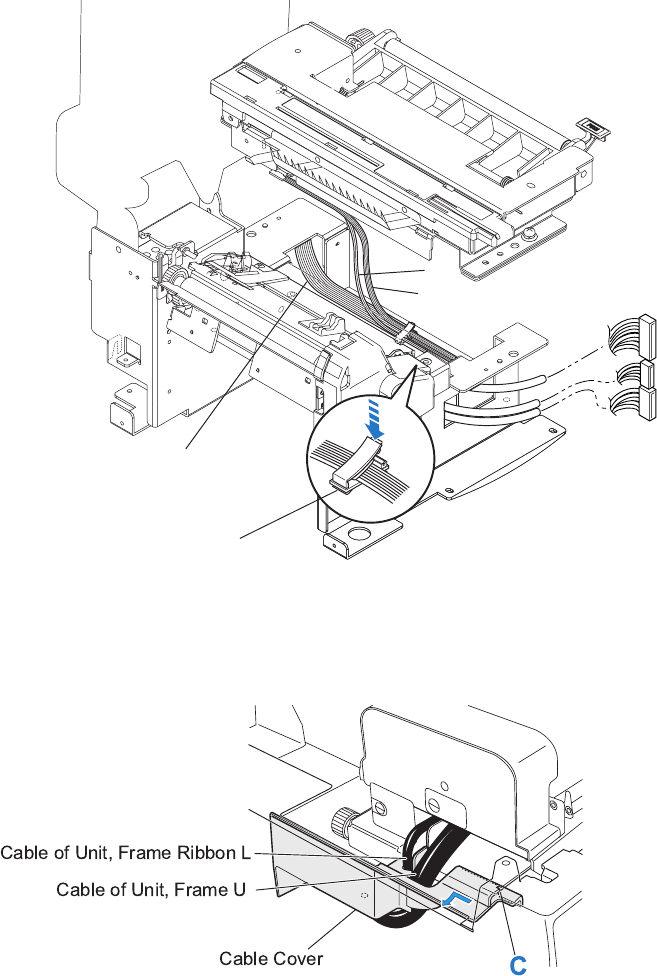
• When assembling the Cable Cover, first insert its right side while aligning the slit “C” and then fit
the Cable Cover by shifting in the direction of the arrow
Also, be sure that the cables are correctly routed in the Cable Cover as shown below.
Clamp, Main Cable
J16
J15
J3
Other Connectors
(J4, J5, J6, J8, J9, J21)
J7
J22


