


Chapter 3 Disassembly and Maintenance
3-5. Disassembly, Reassembly and Lubrication
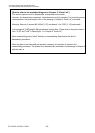
3-13 CL-S700/CL-S703/CL-S700R
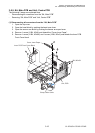
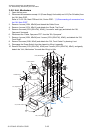
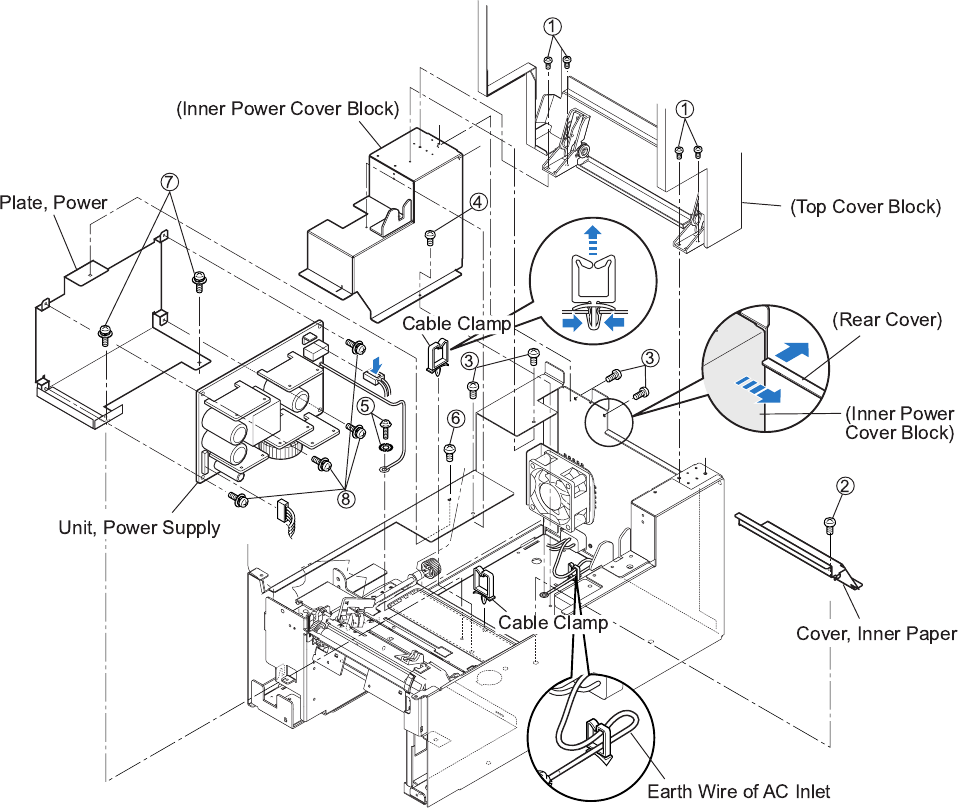
3-5-4. Unit, Power Supply
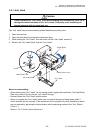
1. Open the top cover and remove 4 screws (1BH, M3x5), then detach the Top Cover block.
2. Open the head block by pushing the head open lever.
3. Open the sensor arm block by pushing the sensor arm open lever.
4. Remove 1 screw (2BH, M3x5) and detach the “Cover, Inner Paper”.
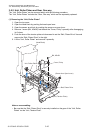
5. On the left rear side of the printer, remove 4 screws (3BH, M3x5K) and 1 screw (4BH, M3x5).
Then, while pushing the rear cover toward the rear to make a clearance, remove the Inner
Power Cover block to the right. (See the magnified figure.)
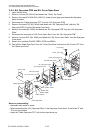
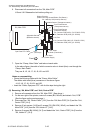
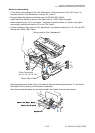
6. Remove 2 cable clamps. (Access to their locks from the bottom of the printer and release the
locks.)
7. Remove 1 screw (5BH (N), M4x4) and 1 toothed lock washer (5EXT, T (N), 4).
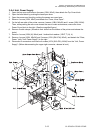
8. Remove 1 screw (6BH, M3x5K) and 2 screws (7PH (SW+PW), M3x5), and detach the “Plate,
Power” (with “Unit, Power Supply”) to the right.
9. Disconnect 2 connectors and remove 4 screws (8PH (SW+PW), M3x5) from the “Unit, Power
Supply”. (Before disconnecting the upper right connector, release its lock.)