Chapter 3 Disassembly and Maintenance
3-5. Disassembly, Reassembly and Lubrication
3-23 CL-S700/CL-S703/CL-S700R
3-5-11. Unit, Sensor Adjust
(1) Removing the “Unit, Sensor Adjust”
Note: The “Unit, Sensor Adjust” can be removed without removing the “Unit, Mechanism”.
1. Open the top cover.
2. Disconnect the connectors J7 and J22 from the “SA, Main PCB”.
Refer to “3-5-5. SA, Main PCB and Unit, Centro PCB” - “(1) Disconnecting all connectors
from the “SA, Main PCB””.
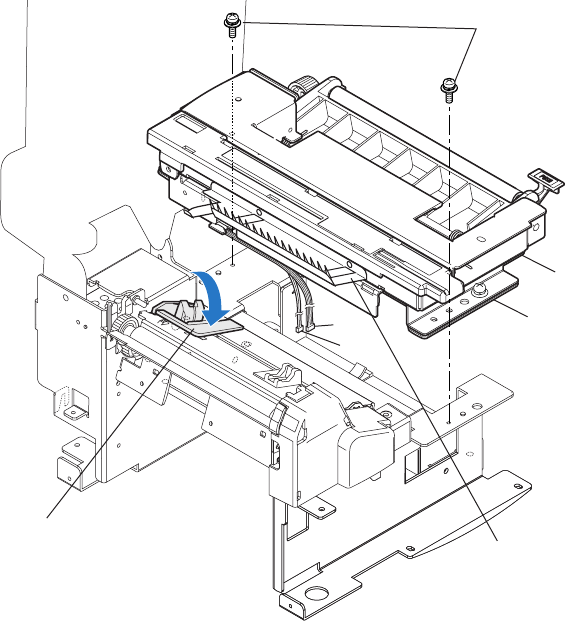
3. Remove 2 screws (PH (SW+PW), M3x5) and detach both “Unit, Sensor Adjust” and “SA,
Base Guide Open”.
4. Remove the “SA, Base Guide Open” from the “Unit, Sensor Adjust”.
Refer to “3-5-10. SA, Base Guide Open.
5. Peel off the Ground Brush from the “Unit, Sensor Adjust”.
Notes on reassembling:
• Be sure to lower the “SA, Sensor U” (Fixed type) before assembling the “Unit, Sensor
Adjust”.
• Run the cables (J7 and J22) as shown and be sure that they are not pinched by the “Unit,
Sensor Adjust”.
Unit, Sensor Adjust
SA, Sensor U (Fixed type)
PH (SW+PW), M3x5
SA, Base Guide Open
J7
J22
Ground Brush
