System Management 4-5
14 In Community Name, type a case-sensitive community name, and then click Add.
15 In SNMP Service Properties, specify whether or not to accept SNMP packets from a
host:
• To accept SNMP requests from any host on the network, regardless of identity,
click Accept SNMP packets from any host.
• To limit acceptance of SNMP packets, click Accept SNMP packets from these
hosts, click Add, type the appropriate host name, Internet protocol (IP) or
Internetwork Packet eXchange (IPX) address, and then click Add again.
NOTE: You can make changes to an entry by clicking the entry, and then clicking Edit. You can
delete a selected entry by clicking Remove.
NOTE: If you remove all the community names, including the default name Public, SNMP
does not respond to any community names presented
. You can add additional community and
host names as necessary.
NOTE: If you change existing SNMP settings, your changes take effect immediately. You do not
need to restart the SNMP service for your settings to take effect. If you are configuring SNMP
for the first time, you must restart SNMP before these settings take effect.
Configuring SNMP Agent Properties
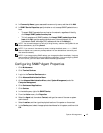
1 Click Maintenance.
2 Click Terminal Services.
3 Log in to the Terminal Services session.
4 Click Advanced Administration Menu.
5 At the Advanced Administration Menu, select System Management, and click
Computer Management.
6 Click Services and Applications.
7 Click Services.
8 In the details pane, right-click SNMP Service.
9 From the Action menu, click Properties.
10 Select the Agent tab, then select Contact, and type the name of the user or system
administrator.
11 Select Location, and then type the physical location of the system or the contact.
12 In the Service panel, select the appropriate check boxes for this system, and then click
OK.


