


MIL-3000FTX Series of FastPort Print Servers 2-6
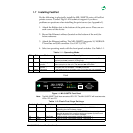
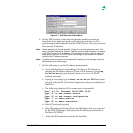
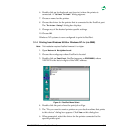
Figure 2-1. Add Reserved Clients Menu
6. Set the DIP switches to the telnet diagnostic monitor position as
described in the hardware guide and reboot the print server. The
system request an IP address from the DHCP Server. The server returns
the reserved IP address.
Note:
Values added to the “Unique Identifier” (Figure 2-1) must be entered correctly. This
entry is the MAC address for FastPort. FastPort sends this MAC address in a request
to the DHCP server for an IP address. If it is entered incorrectly, it will not match the
value sent by FastPort. The DHCP server then assigns it any available IP address
instead of the IP address reserved.
Note:
If FastPort does not respond to the reserved IP address, print a test page. Verify the
MAC address from the test page.
7. Do the following to set the IP address permanently:
a. Verify that FastPort is responding with the new IP address by
pinging the IP address reserved. From a DOS prompt, type: ping
xx.xx.xx.xx and press [return] (where xx.xx.xx.xx is the IP
address reserved).
b. If ping is successful, type: telnet xx.xx.xx.xx 2002 and press
[return] (where 2002 is the telnet diagnostic socket port address for
FastPort).
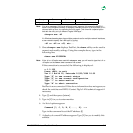
c. The following displays (if the connection is successful):
Vers. 6.1.18, Datecode 10/23/1998 18:50
Type “S” to see current status
Type “D” to see current configuration
Type “!” to enter monitor
Type “A” to abort connection
d. Select [!] and press [return]
e. Select [I] and press [return]. Enter the IP address that was reserved
by the DHCP Manager. This stores the IP address permanently in
FastPort’s NVRAM.
f. Select the [R] command to reboot the FastPort.