


MIL-3000FTX Series of FastPort Print Servers 3-2
4. To configure a system to perform local spooling, refer to:
“Spooling Versus Non-Spooling Printing” on page 3-5
Configuration on this section is now complete.
3.1.2 Printing from Windows for Workgroups
Perform the following to set up FastPort to work with MS Windows for
Workgroups, version 3.11:
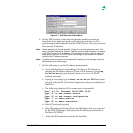
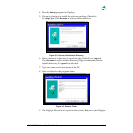
1. From “Control Panel,” double-click on the Printer icon.
2. Click on the Connect button.
3. Click on the Network icon. Browse screen displays FastPort and other
workstations.
4. Find the device name and path fields.
These fields show the local port to redirect and the network device to
receive the print job, respectively.
5. Fill in the path with the FastPort printer name (e.g.,
\\FP042384\PARALLEL1). Or, use the window labeled “show
shared printers on…” to browse the network.
6. When choosing to “Browse” the network, a list of all the shared
windows systems in the workgroup appears. Double-click on
FastPort (all its printer ports display).
7. Double-click on a printer port, and that FastPort Printer name will be
displayed in the path field above.
Workgroups is configured to print for FastPort once the fields are filled in
and the drivers for the printer are loaded.
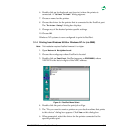
3.1.3 Printing from Windows NT (3.5x)
1. Open the Print Manager.
2. Choose Printer.
3. Click Connect to from the menu. A window displays a list of all
network devices.
4. Double-click on the workgroup where FastPort is located.
5. Double-click on FastPort (one only).