


MIL-3000FTX Series of FastPort Print Servers 4-1
Chapter 4
Installing and Printing on NetWare
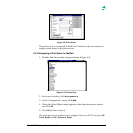
Chapter 4 describes how to use ACT (Advanced Configuration Tool) and
PCONSOLE for installing, configuring, and managing FastPort on
NetWare networks.
Note:
For users of the MIL-3300 series of FastPort, use the ACT3300.EXE utility to
configure FastPort.
4.1 Introduction
Note:
When using Novell NetWare’s client utilities refer to NetWare’s docs.
1. Identify whether FastPort will be installed in:
a. NetWare 2.x, 3.x bindery environments, or
b. NetWare 4.x NDS environment.
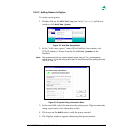
2. Either way, copy ACT from the CD-ROM to your system (refer to
Appendix C for installing and configuring ACT).
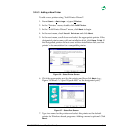
3. Install FastPort in a 2.x or 3.x bindery mode, steps includes:
a. Creating a print server and print queue object on the NetWare
server, then attaching the two together.
b. Creating a config. file that describes the file server and print queue
to service. Store this file on the preferred server: sys:/login/
milan directory as FPXXXXXX.
c. Storing the name of the server in NVRAM, so it knows where to
search for its configuration file. Do this with ACT or FastManage.
4. Install in a NetWare 4.x NDS, steps include:
a. Creating a print server, printer, and print queue in the NDS
database using either NWADMIN or PCONSOLE.
b. Storing context/tree where the print server object was created in
NVRAM. This can be done with ACT, FastManage, or most other
Digi configuration utilities.