SETTING UP
2-6 User's Manual
ASSEMBLING THE PRINTER This section explains how to install the rear stacker and ribbon
cartridge.
Installing the Rear Stacker
The rear stacker enables smooth feeding of both single sheets and
continuous forms. Install the rear stacker as described below:
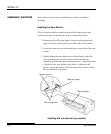
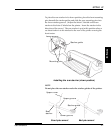
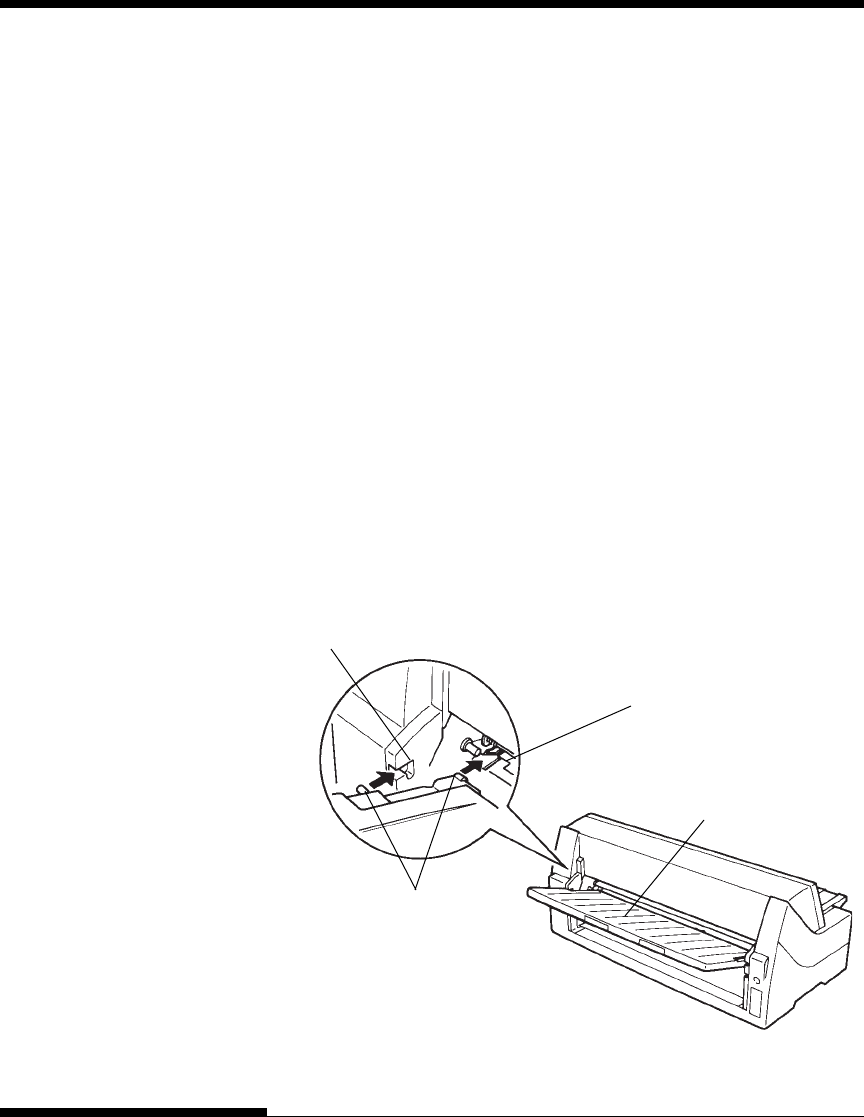
1. Referring to the following figure, located stacker guides and
upper and lower stacker grooves at either side of the printer.
2. Locate the front and rear mounting pins on each side of the rear
stacker.
3. While holding the rear stacker at an inclined angle, slide the
front mounting pins into the stacker guides and the rear
mounting pins into the upper stacker grooves. (Adjust the letter
C labeled on the rear stacker to the letter C labeled on the
printer. Insert the stacker in the direction of the arrow.) This is
the rear stacker’s up position.
Rear stacker
Mounting pins
Upper groove
Stacker guide
Installing the rear stacker (up position)


