30 Using the Projector
Selecting the Image Source
Selecting the image source lets you switch between images input from
different pieces of equipment connected to the projector (such as a
computer and DVD player). If you don’t see the image you want,
select it as follows:
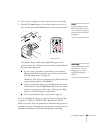
■ On the projector, press the Source button until the correct
device image is projected.
■ On the remote control, press the Computer1/2 button to select
the device connected to the Computer1/Component Video1 or
Computer2/Component Video2 port. For the S-Video or Video
port device, press the
S-Video/Video button.
If a projected image fails to appear, see the next section for help.
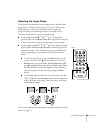
Once you see your image, turn to page 33 for instructions on focusing
and making other image adjustments.
What To Do If You See a Blank Screen
If you see a blank screen or a blue screen with the message No Signal
after turning on your computer or video source, try the following:
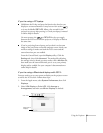
■ Make sure the cables are connected correctly, as described in
Chapter 1.
■ Make sure the power light is green and not flashing and the lens
cap is off.
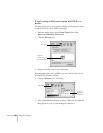
■ Press the Source button on top of the projector to select the
correct source. (Allow a few seconds for the projector to sync up
after pressing the button.)
■ Check the Input Signal setting in the Image menu to make sure
it matches the port to which the device is connected. See page 50.
note
If you don’t hear any sound
and adjusting the volume
controls does not help, you
may need to select the correct
Audio port. See page 51.


