


CAUTION:
If you install a strain-relief bracket option over the end of the power cord that is
connected to the device, you must connect the other end of the power cord to an
easily accessible power source.
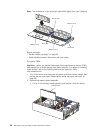
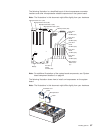
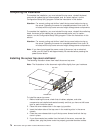
Installing a 3-Pack Ultra160 Hot-Swap Expansion Kit
You can install an optional 3-Pack Ultra160 Hot-Swap Expansion Kit in the server to
connect three additional hot-swap hard disk drives to the server. This kit contains a
hot-swap hard disk drive backplane that you install adjacent to the standard
hot-swap hard disk drive backplane. The server supports a maximum of two
hot-swap drive backplanes.
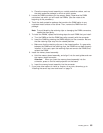
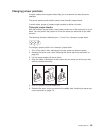
Notes:
1. In addition to the optional hot-swap drive backplane, the 3-Pack Ultra160
Hot-Swap Expansion Kit comes with a hard disk drive cage. Do not install the
hard disk drive cage on the server, as the hard disk drive cage is not compatible
with the xSeries 350 server. The 3-Pack Ultra160 Hot-Swap Expansion Kit can
be installed in various types of Eservers; the hard disk drive cage is used with
other types of servers.
2. Cable identifiers are printed on the cables that come with the server and
options. Use these identifiers to connect the cables to the correct connectors.
For example, the hard disk drive cables are labelled HDD.
3. For information on cabling options and using the 3-Pack Ultra160 Hot-Swap
Expansion option, refer to the documentation that comes with the option kit.
4. For additional information on cabling, see “Cabling example for the ServeRAID
adapter” on page 56 and “Cabling the server” on page 88
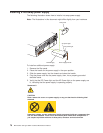
5. The hot-swap drive backplane components are shown at “Installing a hot-swap
hard disk drive” on page 62
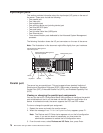
Note: The hard-disk drive activity light and hard-disk drive status light on the
backplane match the hard-disk drive activity light and hard-disk drive status
light on the front of the server (see “Start the server” on page 8).
The rear connectors on the hot-swap-drive backplane (before repeater card is
installed) can be seen at “Installing a hot-swap hard disk drive” on page 62
Installing options 71