


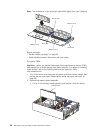
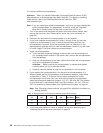


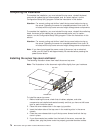
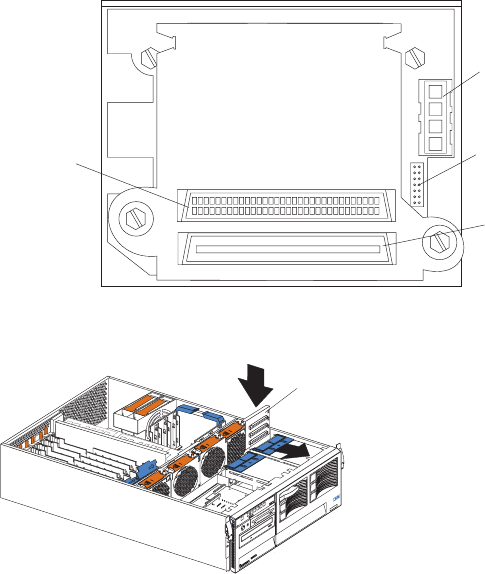
The following illustration shows the rear connectors on the SCSI repeater card after
the repeater card is installed, as viewed from the rear of the server.
SCSI power
cable
connector
SCSI cable
connector
SCSI repeater
card cable
connector
IC cable
connector
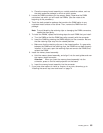
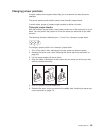
2
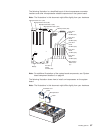
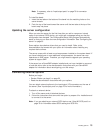
The following illustration shows how to install a 3-Pack Ultra160 Hot-Swap
Expansion Kit.
Expansion backplane
To install a 3-Pack Ultra160 Hot-Swap Expansion Kit:
Attention: When you handle Electrostatic Discharge-Sensitive devices (ESD),
take precautions to avoid damage from static electricity. For details on handling
these devices, refer to the following Web site and search for ESD:
http://www.ibm.com
1. Review the information in “Before you begin” on page 50 and in “Safety
information” on page 127
2. Turn off the server and peripheral devices and disconnect all power cords and
external cables; then, remove the top cover (see “Removing the server top
cover and bezel” on page 53).
3. Refer to the documentation that comes with the option to assemble the
hot-swap expansion option.
4. Align the hot-swap expansion option with the empty slot at the rear of the
optional hard disk drive cage, adjacent to the standard hot-swap hard disk drive
backplane.
5. Slide the hot-swap expansion option down into the guides on the slot at the rear
of the optional hard disk drive cage, and secure it to the server with the blue
slide latch located on top of the optional hard disk drive cage.
6. Refer to the documentation that comes with the option to complete the
installation of the option.
7. Install additional internal hot-swap hard disk drives in the optional hard disk
drive cage (see “Installing a hot-swap hard disk drive” on page 62), and connect
the drives to the optional hot-swap backplane. You can connect a maximum of
three hot-swap hard disk drives to the optional hot-swap backplane.
72 IBM xSeries 350 Type 8682: Hardware Maintenance Manual