


Continuing configuration through Telnet 155
Procedure 18
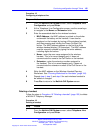
Configuring a telephone line
Step Action
1 From the NetLink OAI System screen, select Telephone Line
Configuration and press Enter.
2 At the Telephone Line Configuration screen, use the arrow keys
to navigate to the Name and Extension fields.
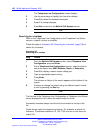
3 Enter the associated data for the wireless handsets.
•
MAC Address—the MAC address is printed on the sticker
underneath the battery on the handset. It can also be
displayed on the handset by turning off the wireless handset,
and then pressing and holding the Power On/Start Call
button. The MAC address appears on the first line of the
wireless handset display (12 characters). The MAC address
must be manually entered by typing the entire address,
including digits and colons.
•
Name—enter the user name assigned to the wireless
handset. This is for record keeping only; it does not
communicate the name to the Call Server or the handset.
• Extension—enter the extension number assigned to
the handset. This is for record keeping only; it does not
communicate the extension number to the Call Server or the
handset.
4 Write the MAC address on the Wireless Handset Planning
Worksheet. See “Planning Worksheet for Handsets” (page 164).
5 Repeat step 4, step 5, and step 6 for each wireless handset to
be added or changed.
6 Press Esc to return to the NetLink OAI System screen.
--End--
Deleting a handset
Follow the steps in Procedure 19 “Deleting a handset” (page 155) to delete
a WLAN IP Telephony Manager.
Procedure 19
Deleting a handset
Step Action
1 From the NetLink OAI System screen, select Telephone Line
Configuration and press Enter.
Nortel Communication Server 1000
WLAN IP Telephony Installation and Commissioning
NN43001-504 03.04 Standard
23 September 2008
Copyright © 2004–2008 Nortel Networks
.