


174 C1553M-B (4/05)
Labels
Labels are free-standing descriptive phrases that are placed on maps. You can associate a script with a label, so that when you click the label,
the script runs. If you omit the script the label is for information only. For example, you might use a label to identify an item on a map.
Before you can place a label on a map, you must create the label. Once created, you can place it as many times as you want on a single map or
on different maps. Each instance of a particular label has the same appearance and runs exactly the same script. The only difference between
one instance and another is its location.
Any label placed on a map can later be moved to a different location on the map using the Move option.
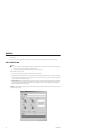
ADD A NEW LABEL
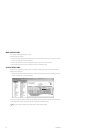
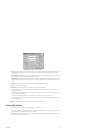
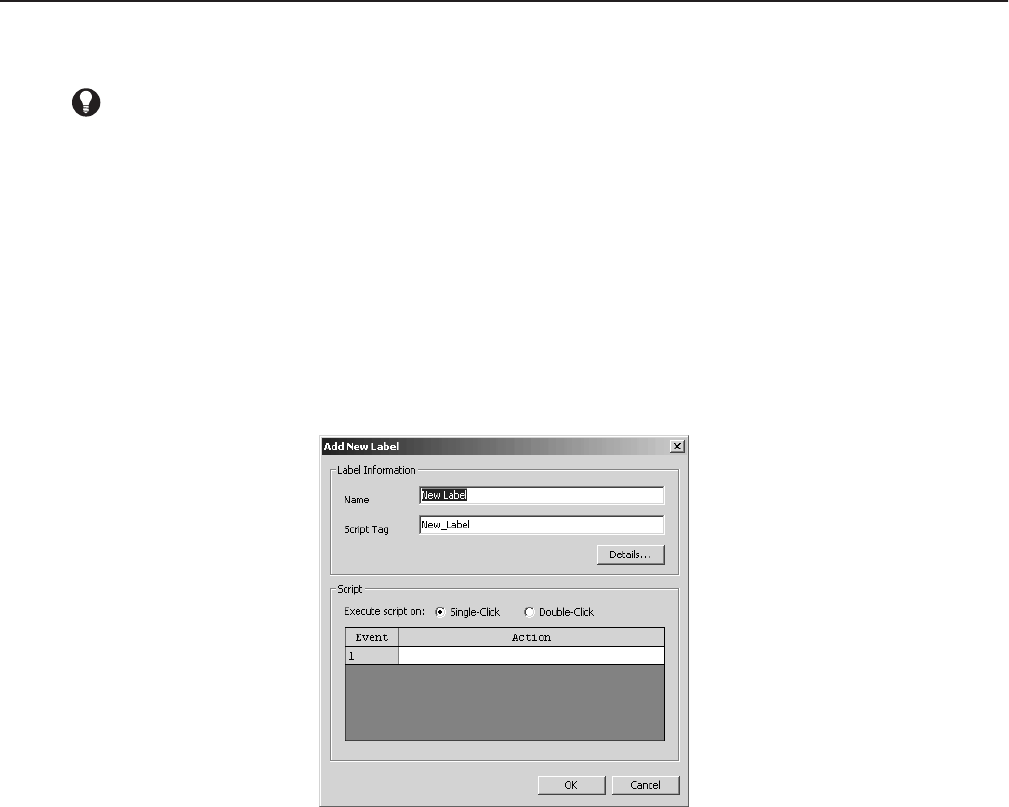
1. Navigate the Object Browser to [project name] > Labels. Double-click <Add New Label> in the right pane, or right-click Labels in the left
pane and select Add New from the pop-up menu. The Add New Label dialog box opens.
Figure 205. Add New Label Dialog Box
2. Name: Type a unique, descriptive name for the label you want to add. Label names are at most 50 characters long and can include any
letter, digit or special character, with the exception of single and double quotation marks. Label names are not case sensitive. A tag
resembling the name appears in the Script Tag box. If the name contains special characters, they are omitted from the tag. Spaces are
replaced with underscores. Leading digits are removed.
3. Script tag: If you do not want to use the script tag provided by the server, type a unique, meaningful tag. Script tags are at most 50
characters long. They can include any letter, digit or the underscore character, but cannot begin with a digit. They cannot contain spaces or
special characters. Tags are not case sensitive. Use the script tag to refer to the label in scripts. For a list of label properties that can be
scripted, refer to Scripts and Expressions - Properties of Objects.
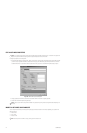
4. Details: To edit the text and formatting of the label, click Details. The Properties dialog box opens.
TIP: Device icons and alarm/event icons have built-in labels associated with them. Built-in labels are for information only; you cannot
associate a script with them. Refer to Edit a Device’s Local Settings for information on displaying a device’s label. Refer to Alarms and
Events - Alarms, Events, and Normal Occurrences for information on displaying an alarm or event’s label.