222 C1553M-B (4/05)
ALARM/EVENT CATEGORIES
ADD A NEW ALARM/EVENT CATEGORY
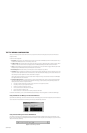
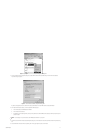
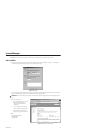
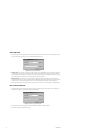
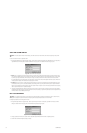
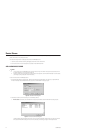
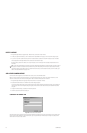
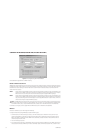
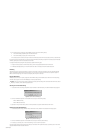
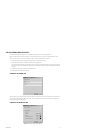
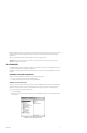
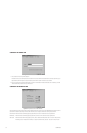
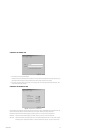
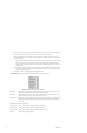
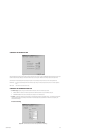
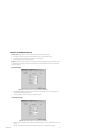
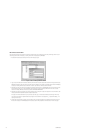
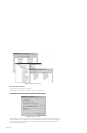
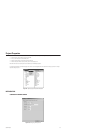
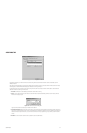
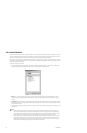
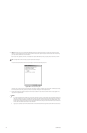
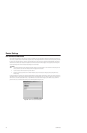
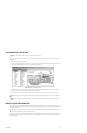
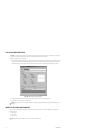
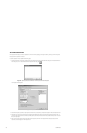
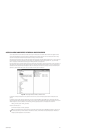
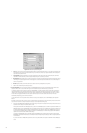
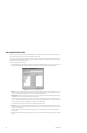
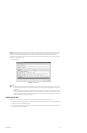
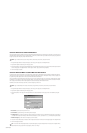
1. Navigate the Object Browser to [project name] > Alarms and Events. Double-click <Add New Category> in the right pane, or right-click
Alarms and Events in the left pane and select Add New from the pop-up menu. The Add New Category dialog box opens.
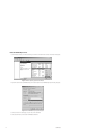
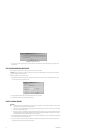
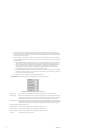
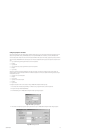
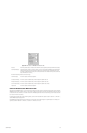
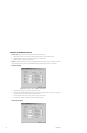
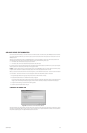
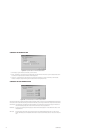
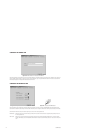
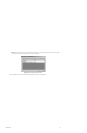
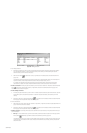
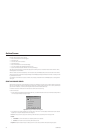
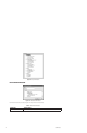
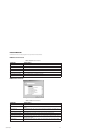
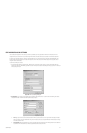
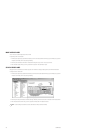
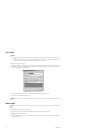
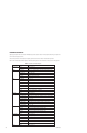
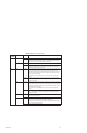
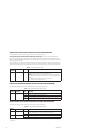
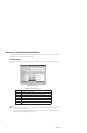
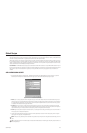
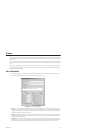
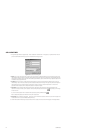
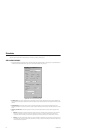
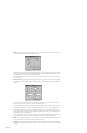
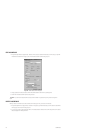
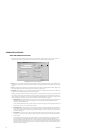
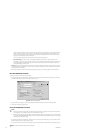
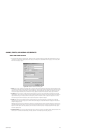
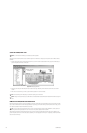
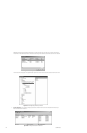
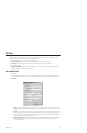
Figure 243. Add New Category Dialog Box
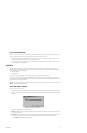
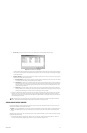
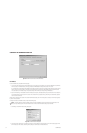
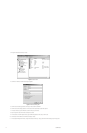
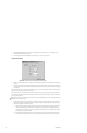
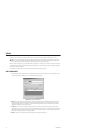
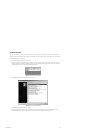
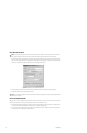
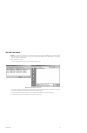
2. Name: Type a unique, descriptive name for the alarm/event category you want to create. Category names are at most 50 characters long
and can include any letter, digit or special character, with the exception of single and double quotation marks. Category names are not case
sensitive.
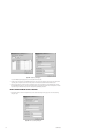
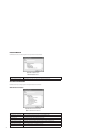
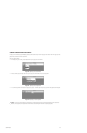
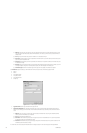
3. Type: Type a description of the type of category. The description appears in the right pane of the Object Browser beside the category name,
and in the Session Manager entries for alarms and events in this category. The type is required.
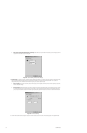
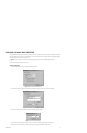
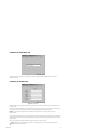
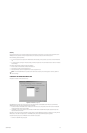
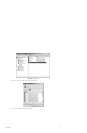
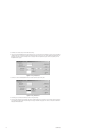
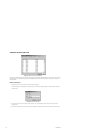
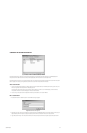
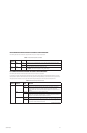
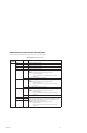
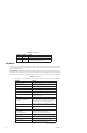
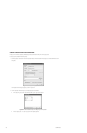
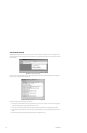
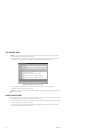
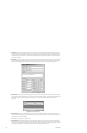
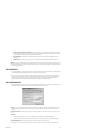
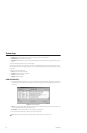
4. Recipients: Select the recipient group you want notified when alarms and events in this category occur. Recipients are only notified if they
are logged in to the client before the alarm/event status becomes Complete.
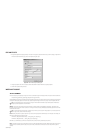
Specifying recipients also determines which clients the alarm’s scripts run on. An alarm’s scripts run on the client of any operator specified
in the category’s recipient group, provided the client is running and the operator is logged in when the script executes. If the client is not
running or the operator is not logged in, or if no recipients are specified in the category, VMX300(-E) runs as much of the scripts as possible,
namely, statements that do not require a recipient, such as a statement that sets the value of a device property.
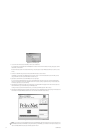
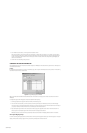
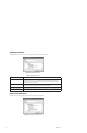
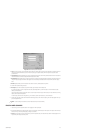
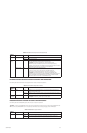
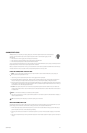
a. Recipient group: Select the recipient group from the drop-down list. If you have not created the recipient group yet, finish adding the
new category, create the recipient group, then edit the category to assign the recipient group. Refer to Recipient Groups for
information on creating recipient groups.
To send notification simultaneously to every operator configured on that server who is logged in, select the predefined recipient group
All Users. Select <none> if you do not want anyone to be notified.
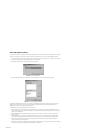
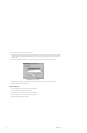
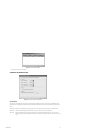
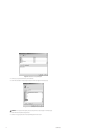
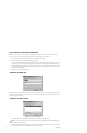
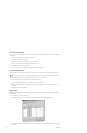
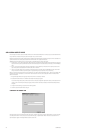
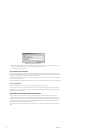
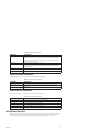
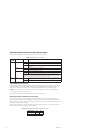
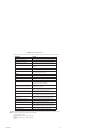
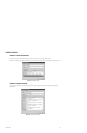
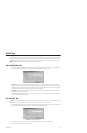
b. Send action to first: If you want notification sent to the member at the top of the recipient group’s Members list, select Send action
to first available user/group. When an alarm or event in this category is triggered, the server will scan down the list until it finds a
member who is logged in, and send notification to that member. If the recipient is a user group, notification is sent to all members of
the group who are logged in.
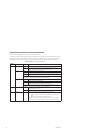
c. If no response: If you want the server to notify one recipient after another until someone responds to the alarm or event, select “If
no response in _ seconds, move to next available user/group” and type the number of seconds you want to elapse before notifying
the next recipient.
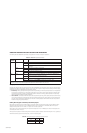
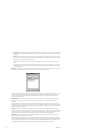
A recipient responds to the alarm or event either by acknowledging it, if it requires acknowledgment, or by responding to a prompt
that the script displays using the PROMPT command. If you define a prompt for the response, the prompt displays on the first
recipient’s workstation for the specified duration, then is removed from the first recipient’s workstation and displayed on the second
recipient’s workstation for the specified duration, and so on, until either an operator has responded or the list of recipients has been
exhausted. If the list has been exhausted, the prompt is then simultaneously redisplayed on every recipient’s workstation, where it
remains until someone has responded.