


NetEngine IAD User Guide
Quick Start Guide 11
vertically, ensure at least 3 inches of distance between other IADs or other
equipment.
Wiring Requirements
Make sure that the telephone wiring, LAN and WAN cables reach the IAD
and can be dressed in a manner that is safe for the wiring, does not pull or
create lateral stress on the connectors or ports on the rear of the IAD, and
does not present a trip hazard to personnel working in the vicinity of the
equipment. Do not connect any cables or wiring at this time.
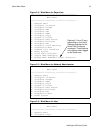
Connect
via
Terminal
Emulator
The IAD is configured and managed from either the console or Ethernet
port. Most network engineers use Telnet to access the IAD via Ethernet.
After you use a terminal emulator program via the console port to set the
IP address, you may continue to use a terminal emulator via the console
port if you choose.
Before you can connect to the IAD via Telnet, make sure the IP address is
set correctly for this network. To do so, follow the steps, each described in
detail below:
1. Connect the IAD to a PC
2. Log in to the IAD
3. Set the IP address
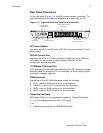
Connect the IAD to a PC
To connect the IAD to a PC via the console port:
1. Turn off both devices and insert the male connector of a DB9 serial
cable into the console port on the IAD.
2. Insert the female connector of the cable into a serial (COM) port on
your PC.
NOTE
6000 family IADs may be stacked on top of one another,
when mounted horizontally. 7000 family IADs may be rack
mounted.
NOTE
After a period of inactivity (three minutes by default), the IAD
automatically terminates console-based and Telnet sessions
to maintain security. To change this value, see Configuring
the Console Timeout Period on page 38.
NOTE
Be sure that the IAD and PC are both powered OFF before
connecting the console cable. If both devices are not turned
off when you connect the cables, you may place the IAD in an
unstable state, and you may need to reset one or both
devices before you can perform configuration tasks.
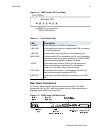
NOTE
See RS-232 DB-9 Console Port Pin Assignments on page
289 for console port specifications.