


146
Recording Songs
Inputting Data One Step at a
Time (Step Recording)
Step Recording is the method of inputting notes and rests
individually, as if you were writing them onto a musical staff. In
addition to inputting notes, this method can also be used to create a
song by joining patterns.
Inputting Notes and Rests
1.
Make sure that the preparations for recording have been
performed as described in “Before You Record a New Song”
(p. 141).
If you will be recording into an existing song, load the desired song
into internal memory (p. 149). Then use [FWD] or [BWD] to specify
the measure at which you want to start recording. The recording-
start measure is indicated by “M=” at the top of each PLAY screen.
2.
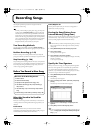
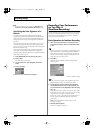
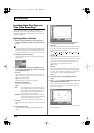
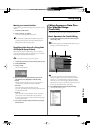
Press [REC], and then [6 (Step Rec)].
The [REC] indicator will blink, and the Step Recording Standby
window appears.
fig.10-10_50
3.
Make settings for step recording. Use [CURSOR] to move
the cursor to the desired parameter, and turn the VALUE dial
or press [INC]/[DEC] to set it.
• Rec Track
Specify the phrase track or pattern on which you want to record.
“TRK” will appear if you press [1 (Song List)], and “PTN” will
appear if you press [2 (PTN)].
Value:
AUTO, TRK 1–TRK 16
PTN001–PTN100 (* when recording on a pattern)
• Rec Mode (Recording Mode)
Select how recording is to take place.
Value
MIX:
Mix-recording will be carried out. Normally, you will
record using this method. If a performance has already
been recorded on the recording-destination track, your
newly recorded performance will be added to the
existing performance without erasing it.
REPLACE:
Replace-recording will be carried out. If a performance
has already been recorded on the recording-destination
track, it will be erased as you record your new
performance. Use this when you want to re-record.
• Start Point
Specify the location (measure-beat-clock) at which recording will
begin.
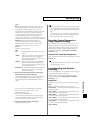
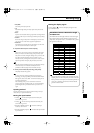
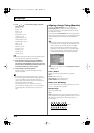
4.
Press [8 (Note)] or [PLAY].
The [REC] indicator will light, and the Step Recording screen
appears.
fig.10-11_50
5.
Specify the note that you want to input. Use the function
buttons ([6][7][8]) to select the desired parameter.
• Note Type
Specify the length of the notes that you want to input, in terms of
a note value. The length of the note value indicates the length
from one note-on to the next note-on.
Value:
, , , , , , , , , , , ,
, , , , ,
• Gate Time
Specify the proportion of the gate time relative to the Note Type.
The gate time is the length between note-on and note-off. Specify
a lower value if you want the notes to be played staccato, or a
higher value if you want the notes to be played tenuto, or as a
slur. Normally, you will set this to about “80%.”
Value:
1–100%
• Input Velo
Specify the strength with which the note will be played. If you
want this to be the strength with which you actually pressed the
key, select “REAL.” Otherwise, use settings of p (piano)=60, mf
(mezzo forte)=90, or f (forte)=120 as general guidelines.
Value:
1–127
6.
Turn the VALUE dial or press [INC]/[DEC] to make the
setting.
7.
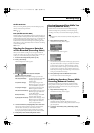
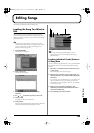
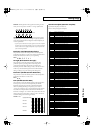
Press or to move to the desired input location, and
press a note on the keyboard or a pad.
When you press a key or a pad, the input position will advance
by the value of the Note Type you specified. The velocities are
displayed as a bar graph.
fig.10-11a_50
You can use the function buttons ([1][2][3][4][5]) to perform the
following operations.
Reference_e.book 146 ページ 2003年7月14日 月曜日 午後3時25分