


4 Replacement Procedures 4.12 System board
Installing the system board
The following describes the procedure for installing the system board (See Figure 4-23 and
4-24).
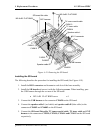
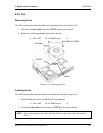
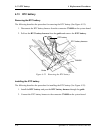
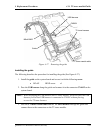
1. Connect the DC-IN jack, SD board flat cable and SVP harness to the system board.
2. Install the BATT CONN cover with fitting to the slot of the base assembly.
3. Install the DC-IN jack to the base assembly.
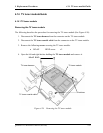
4. Install the system board. When installing, insert the battery connector under the
BATT CON cover and the set the opposite side of the system board. When setting the
board, be careful not to break the I/O connectors on the system board. Then secure
the system board with the following screws.
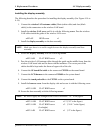
• M2.5×4B FLAT BIND screw x4
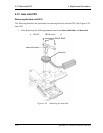
NOTE: (for the model with the wireless LAN)
When installing the system board, make sure Wireless LAN KILL switch is fit to
the slit of the base assembly.
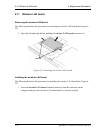
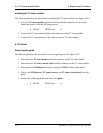
5. Pass the USB cable along to the guide on the base assembly and secure the USB
cable with the insulator.
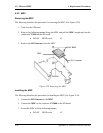
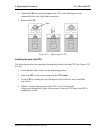
6. Connect the VGA fan cable to the connector CN8780 on the system board from the
bottom side.
QOSMIO F10 Maintenance Manual (960-498) 4-39