


Installing CVLAN Client Software
Issue 1 October 2003 145
The mount command format is as follows:
mount -F cdfs -r /dev/cdrom/device/mountpoint
where device specifies the CD-ROM drive that contains the Telephony Services
installation disk and mountpoint is the name of an existing directory
(such as /cdrom1 or /CD-ROM_1) on which to mount the CD-ROM. You can use the
ls command to find the appropriate names for your system.
Note:
Note: Desktop users may find it easier to mount the CD-ROM by double-clicking
on the CD-ROM icon in the "Disks-etc." folder.
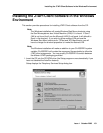
5. At the command prompt, enter the pkgadd command.
The pkgadd command format is as follows:
pkgadd -d /mountpoint/client/cvlan/unixware/cvlanxcl.spl
where mountpoint is the name of an existing directory
(such as /cdrom1 or /CD-ROM_1) on which to mount the CD-ROM. (Note that the full
pathname, beginning with a ’/’, is required.)
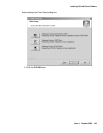
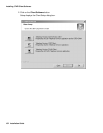
6. The system now displays a list of the packages in the spool file. Press <Enter> to
select the cvlanxcl package.
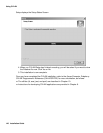
7. Unmount the CD-ROM.
The umount command format is as follows:
umount /dev/cdrom/device
where device specifies the CD-ROM drive that contains the Telephony Services
installation disk. You may now remove the CD-ROM.
After installation has completed, asaidll.lib, asaidll.dll, header files, and some utilities
will have been installed.
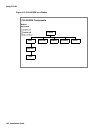
Once you have completed the CVLAN installation, refer to the Avaya Computer Telephony
CVLAN Programmer’s Reference (CALLVISR.PDF) for more information, as follows.
● The utilities (itt, asai_test, and perf) are described in Chapter 10.
● Instructions for developing CVLAN applications are provided in Chapter 6.